BrassRing Lead Manager users, such as Recruiters or Marketing Administrators, can now customize their landing pages through the BrassRing Lead Manager Settings in the Workbench application. This enhancement enables them to capture leads more effectively by utilizing tailored branding, input fields, and layouts that align with their company’s specific requirements.
Path: Workbench >> Tools >> BrassRing Lead Manager >> Actions >> Landing Pages
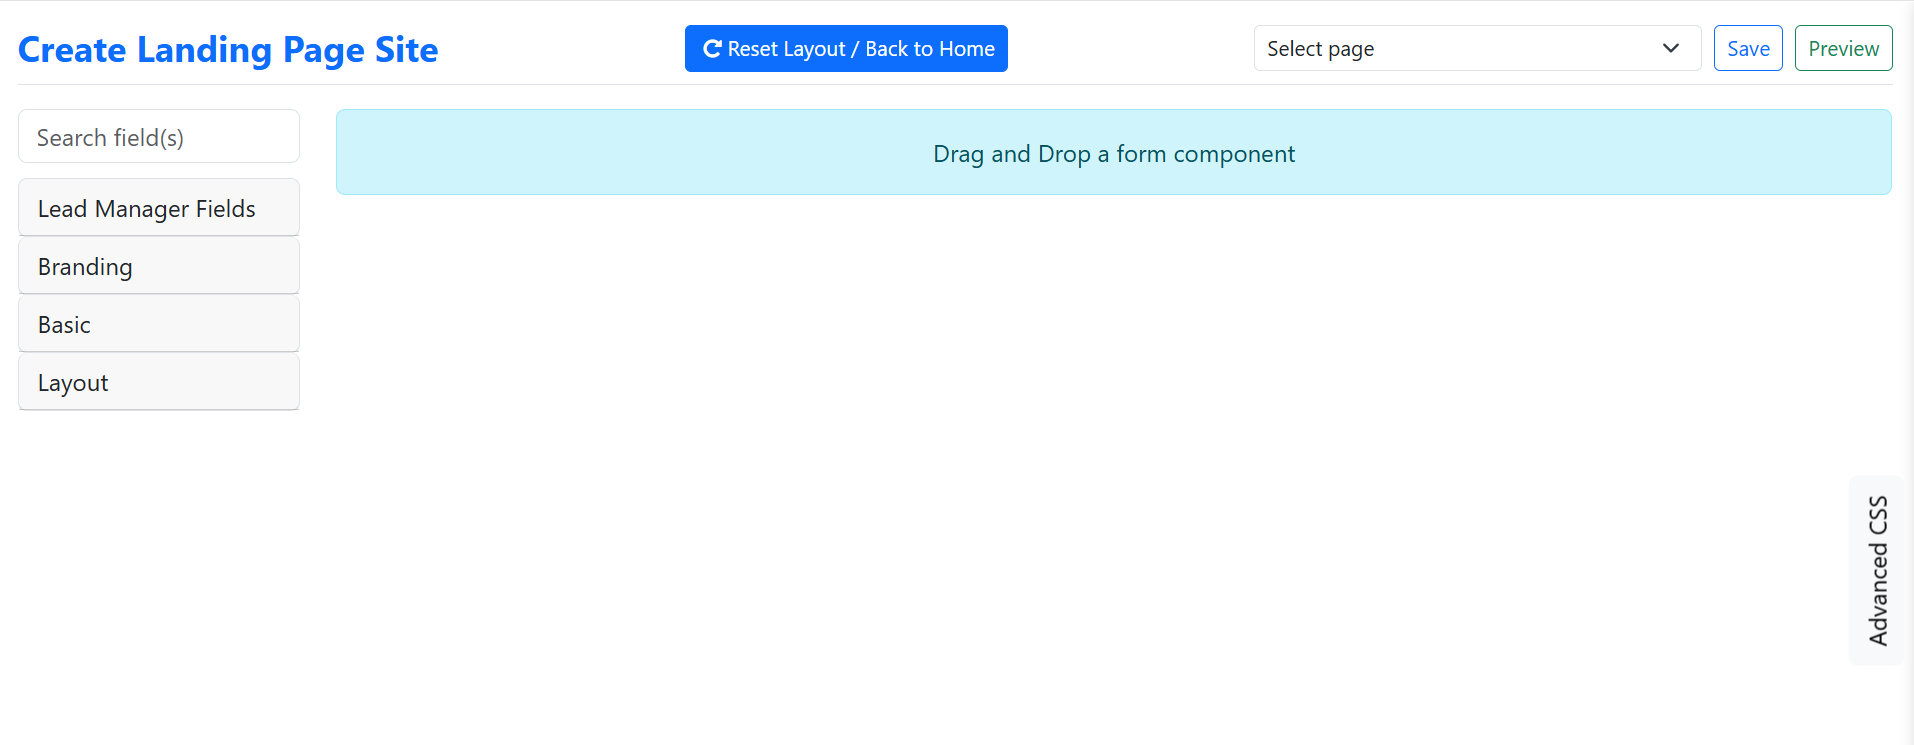
Accessing the Landing Pages opens a custom page builder that allows users to create their own landing pages. Users can easily drag and drop fields and components from four sections on the left side: BrassRing Lead Manager Fields, Branding, Basic, and Layout. Additionally, the 'Advanced CSS' option, found on the right side of the landing page configuration, can be applied for further customization.
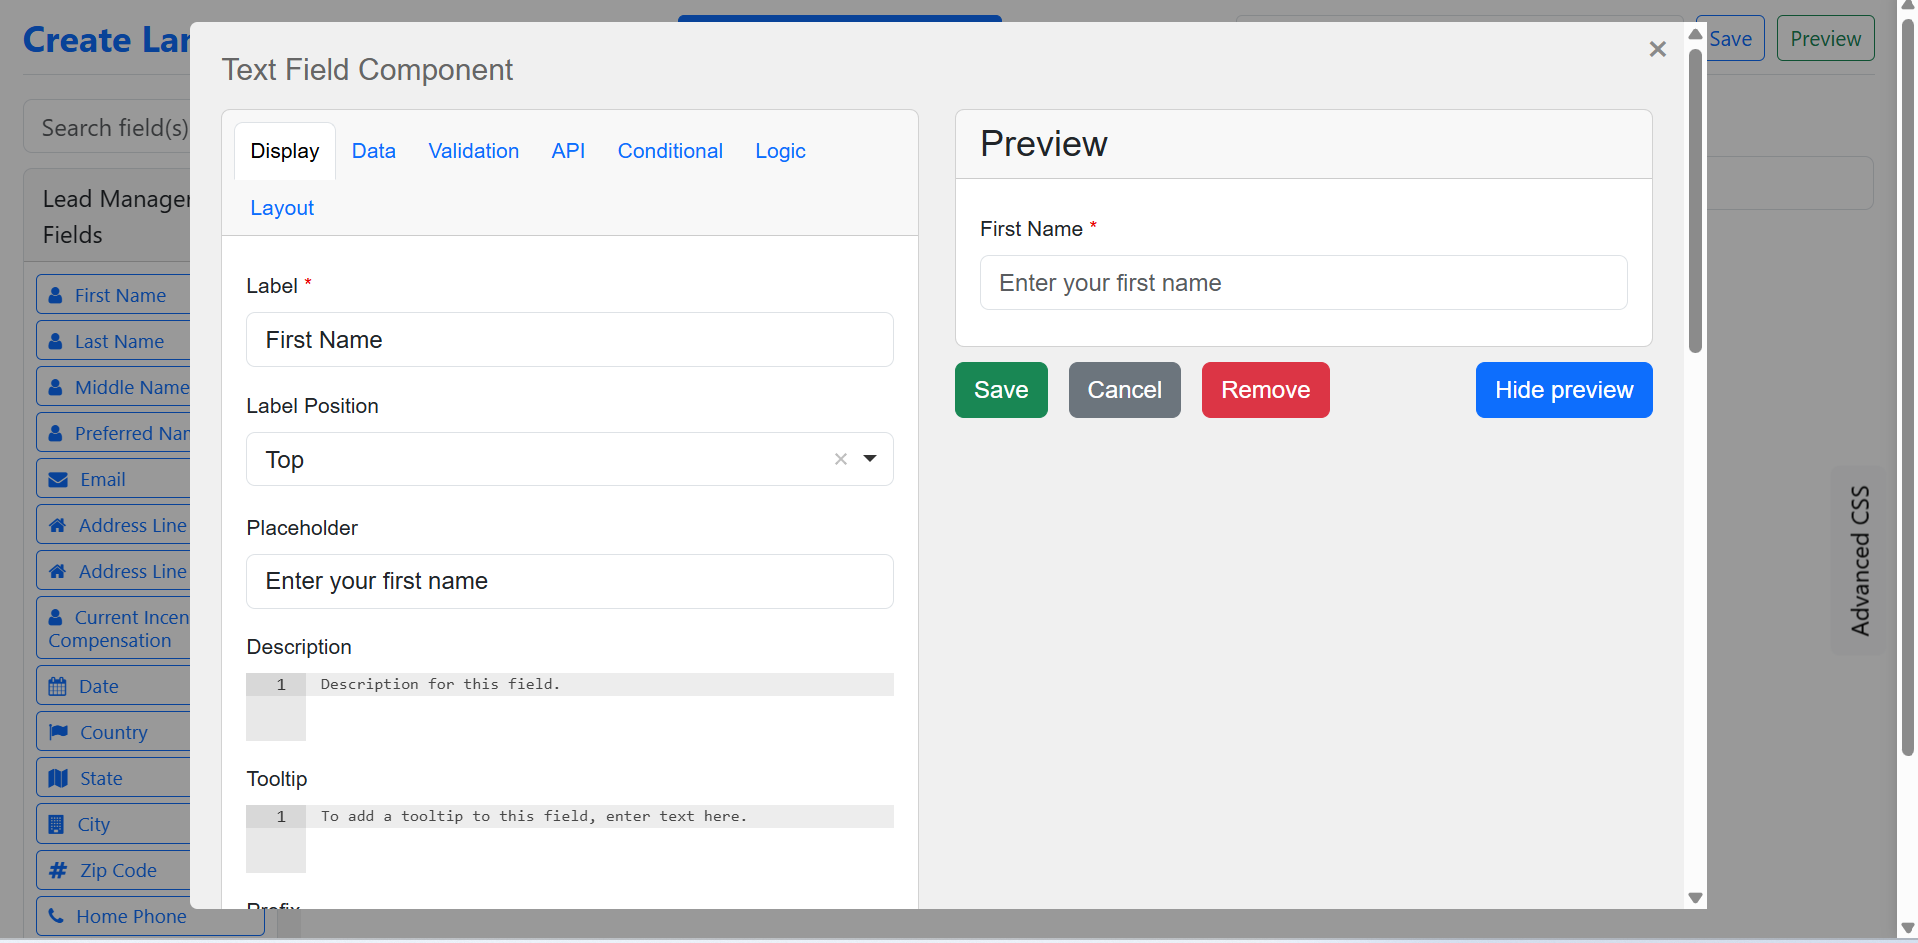
Users have the ability to customize every field and component on the landing pages. There are tabs for Display, Data, Validation, API, Conditional, Logic, and Layout, where users can view different attributes to effectively design their landing pages and apply branding as needed.
Configuring Keys in Landing Pages:
Please ensure the exact casing is used while configuring keys in Edit JSON, as any mismatch may result in data not being saved or mapped correctly.
1. Lead Sources
While configuring Lead Sources in landing pages:
Drag a Single Select or Multi Select field.
In the Edit pop-up, go to the Data tab and configure the options.
.png)
Option Format
Label should contain the name of the option.
Value should contain the code and name, separated by three underscores (___), in the following format:
code___name
Ex: LP_Main___MSCCN Landing page

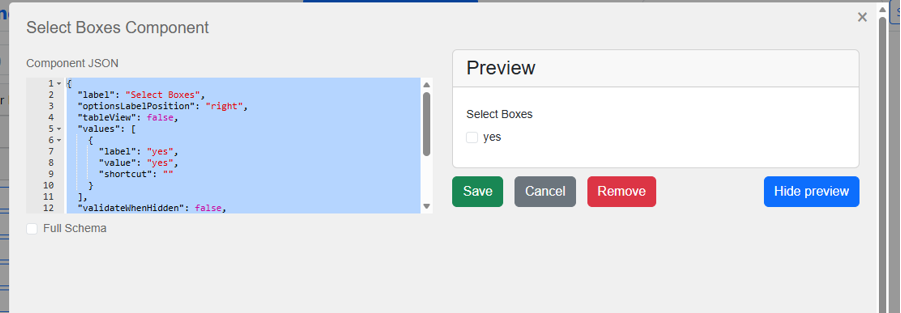
3. After configuring the options, go to Edit JSON (Click the wrench icon for the field) and update the key to:
leadSource (case-sensitive)
2. Campaign ID
While configuring Campaign ID fields:
Drag a Text or Text Area field.
In Edit JSON, update the key to:
customCampaignId (case-sensitive)
3. Custom Fields
While configuring Custom Fields:
In Edit JSON, the key should follow the format, and note that this key is case-sensitive.
custom_<fieldID>_<fieldType>
Example: custom_12_Text , custom_126_TextArea
Steps to Add a Custom Question on the Landing Page:
Add the Custom Field in Workbench
Navigate to Tools > BrassRing Lead Manager > Administer Lead Fields.
Create and save the required custom field.
Identify the Field ID
Edit the newly created field.
Open the browser's Developer Tools and navigate to the Network tab.
Locate and note the Field ID associated with the custom field.
Add the Custom Question to the Landing Page
Open the landing page editor.
Add the custom question.
Select Edit JSON Component for the question.
Configure the JSON Key
In the Key field of the JSON component, enter the value using the following format:
72 (Identified in Step 2)= Field ID
Singleselect = Field Type
Notes
Ensure the Field ID matches the custom field created in Workbench.
The Field Type must correspond to the type of field configured (for example, Singleselect, MultiSelect, Text, etc.).
Any mismatch between the Field ID and Question Type may prevent the custom question from functioning correctly.
Example Key: custom_72_SingleSelect
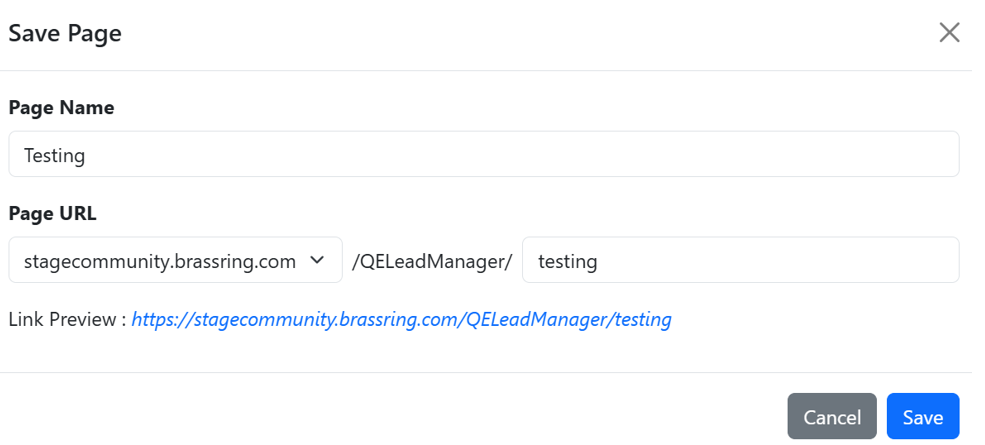
After configuring the landing page, the BrassRing Lead Manager Admin user can save it by entering the 'Page Name' and 'Page URL.'
The BrassRing Lead Manager Admin users can activate, save as, preview, and edit fields/components on landing pages from draft, active, or inactive sections. This enables users to manage their landing pages by viewing or editing existing ones, filtering by published or draft status, checking modification dates, creators, and URLs, ensuring control, visibility, and effective data collection. The landing page is accessible via the assigned custom domain URL.
Note: Once the page is activated, the custom domain URL may take up to an hour to become active.
Leads can upload their resumes and attachments directly on the landing page when the BrassRing Lead Manager fields and components are properly configured. This creates a seamless, branded experience for leads while enabling the upfront collection of their documents during the lead capture process. Uploaded files are successfully stored and linked to the lead record in the BrassRing Lead Manager.
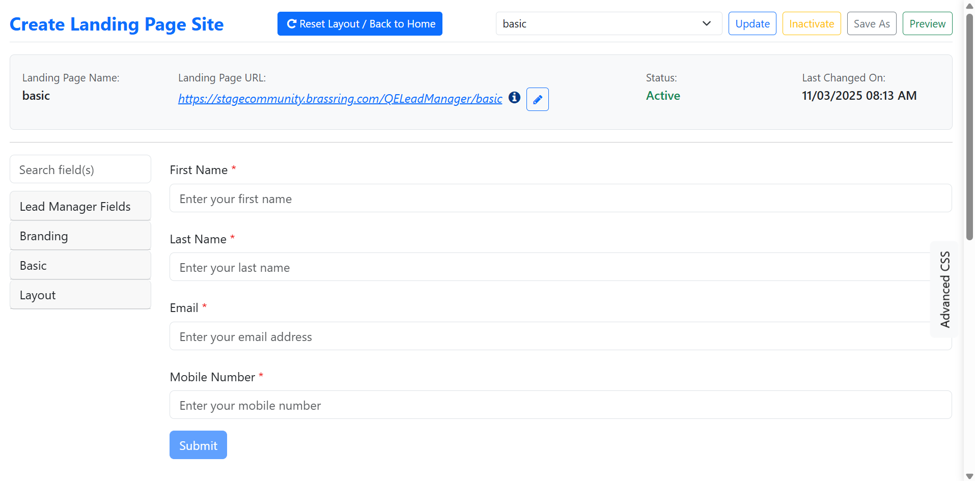
BrassRing Lead Manager Fields: The following fields for the BrassRing Lead Manager can be customized on the landing page.
First Name
Last Name
Middle Name
Preferred Name
Address Line 1
Address Line 2
Date
Country
State
City
Zip Code
Home Phone
Mobile Number
LinkedIn URL
Twitter URL
Facebook URL
Desired Compensation
Current Base Compensation
Current Benefits Compensation
Education
Experience
Custom Question
Custom Textarea
Custom Radio Group
Custom Single Checkbox
Consent for Email Communication
Consent for SMS Communication
Has Worked For Client
Has Relatives Working For Client
Area Of Interest
Resume upload
Attachment upload
Branding: The following branding components can be customized on the landing page.
Header
Image
Basic: The basic components that can be configured on the landing page are as follows:
Text Field
Text Area
Number
Password
Checkbox
Select Boxes
Select
Radio
Button
Layout: The following layouts can be customized on the landing page.
HTML Element
Content
Columns
Field Set
Panel
Table
Tabs
Two Columns
Three Columns
Well
Note:
BrassRing Lead Manager custom fields currently cannot be used as tags in emails, but there are future enhancements planned.
Bulk uploads of leads are currently limited to 5,000 at a time, and we are working on expanding this limit in a future enhancement.
Talent community pages have been upgraded to include date pickers and field driving rules.
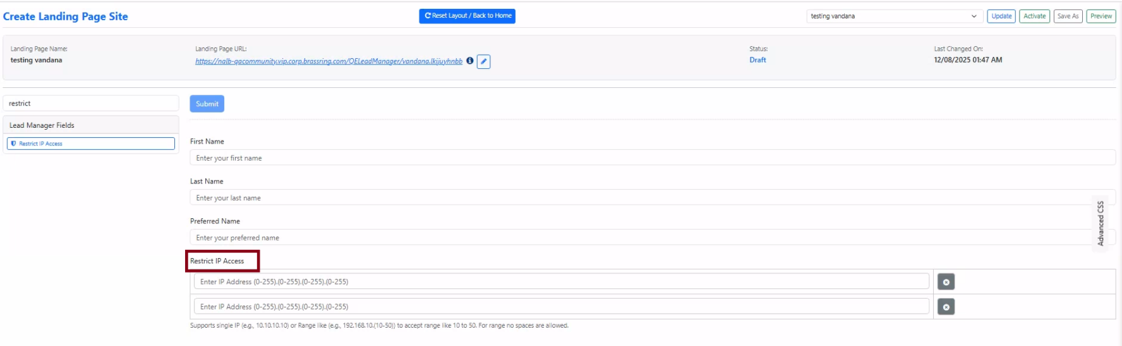
Lead Manager: IP Restriction for Landing Pages
Workbench Admin can configure the "Restrict IP Access" field on the landing pages and can add multiple IPs to prevent access from outside the client’s network.
Note: The “Restrict IP Access” field supports a single IP (e.g., 10.10.10.10) or a range like (e.g., 192.168.10.(10-50)) to accept a range like 10 to 50. For a range, no spaces are allowed.