- 05 Oct 2025
- 2 Minutes to read
- Print
- DarkLight
Creating And Adding Contacts To A Query and Contact List
- Updated on 05 Oct 2025
- 2 Minutes to read
- Print
- DarkLight
Abstract
Product: Acoustic Campaign
Creating And Adding Contacts To A Query and Contact List
Contact or query lists are used to send communications to your Leads in Lead Manager, or used within Acoustic Campaign for mass mailings and program automation.
Contact Lists can be used to send communications to a specific list of individuals. To receive the email, the individuals must first be added to the contact list within Acoustic Campaign. The list does not dynamically change, so individuals must be manually added, or removed, in Acoustic Campaign.
Query lists can be used to send communications to a dynamic list of individuals. To receive the email, the individual must meet the query criteria set in Acoustic Campaign.
Relevant eLearning:
Process:
Create A Contact List.
Select Menu → Data → Databases.
Select the database that is connected to your Lead Manager account.
Select Create Contact List.
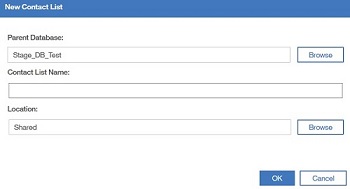
In the window that opens;
Select Browse.
Select the database that is connected to your Lead Manager account.
Enter the name of the Contact List.
Confirm that the location is in the ‘Shared’ folder. Only Shared contact lists are available to select in Lead Manager.

Select OK.
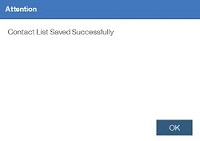
A notification appears stating that the Contact List Saved Successfully. Select OK.

Add Contacts To A Contact List.
Select Menu → Data → Databases.
Select the database that is connected to your Lead Manager account.
Select the Contact List to add contacts to.
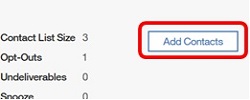
Select Add Contacts.

Click Select from Parent database.
Check the contacts to be added to the contact list.
Select Add Contacts.

Create A Query List.
Select Menu → Data → Databases.
Select the database that is connected to your Lead Manager account.
Select Queries and select Create Query.
In the window that opens;
Select Browse.
Select the database that is connected to your Lead Manager account.
Enter the name of the Query List.
Confirm that the location is in the ‘Shared’ folder. Only Shared contact lists are available to select in Lead Manager.
Select the Type: Query.
Select OK.
Select the criteria to run when the query list is selected for send communication.

Profile criteria can run a query on data fields from the Lead Profile.

Behavior criteria can run a query on the behavior of the recipient.

Criteria can include multiple profile and behavior sets.
Select Save and Calculate.
The calculate query data job page opens. To edit the query criteria, select Cancel. To be notified when the job is complete, check the box, and enter the email address.

Select Submit.
Edit a Query List.
Select Menu → Data → Databases.
Select the database that is connected to your Lead Manager account.
Check the query to edit, and select Edit Query.

The current query criteria displays. Edit the criteria by using the same method as creating the query.
Edit existing criteria by hovering over the criteria, and selecting the pencil icon.
Delete existing criteria by hovering over the criteria, and selecting the cross.

Select Save and Calculate.
