- 28 Feb 2024
- 1 Minute to read
- Print
- DarkLight
Configuring BrassRing to Onboard Pass-Through Authentication
- Updated on 28 Feb 2024
- 1 Minute to read
- Print
- DarkLight
Abstract
Pass-through authentication enables the BrassRing user to launch Onboard and be authenticated and logged into Onboard automatically. When pass-through authentication is enabled, Onboarding is available to the BrassRing user via their Candidates menu.
Using the BrassRing login URL, log directly onto the client's BrassRing site with your support user name.
In the Candidates menu, select Onboarding. This will now authenticate you into Onboard where you can add your TDI User.
Select Candidates - BrassRing Home page
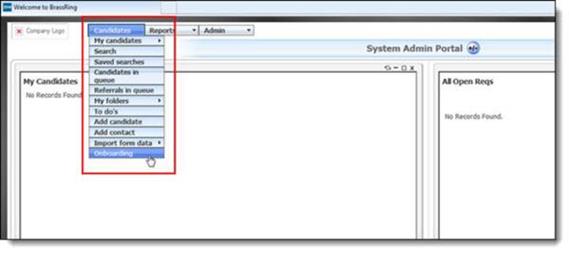
IMPORTANT: After the TDI User is added, it is recommended that you remove the Onboarding Menu item so that it is not available to use within BrassRing Platform as follows: WB → Tools → Users → User types → Edit type permissions → Admin → Onboarding - hide menu option
Enable Client Setting Enable Onboarding user authentication (if applicable).
Note
This is only required if Onboard will be used within the Talent Suite.
Figure 4. Enable Onboarding User Authentication

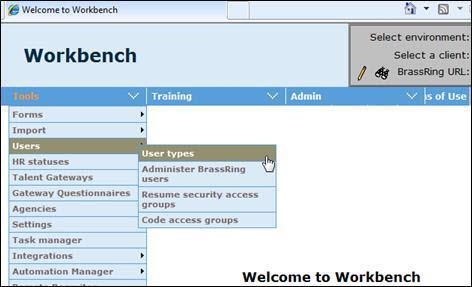
Add Onboarding access User types settings for those user types that will be authenticating into Onboard from BrassRing via WB Tools → Users → User types.
Figure 5. Workbench - User types
Select the Edit type permissions pencil icon to open the Edit System Admin step 1: Set name and functions page.
Figure 6. Workbench - Edit type permissions
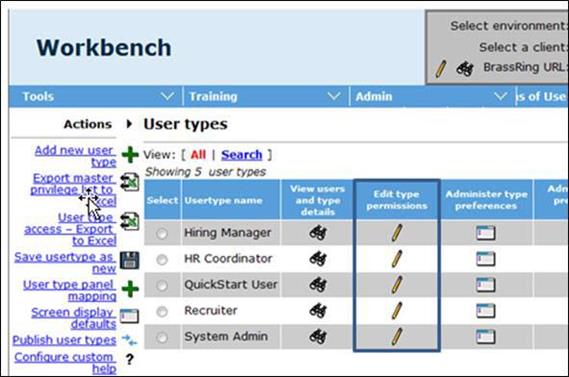
Figure 7. Workbench - Set privileges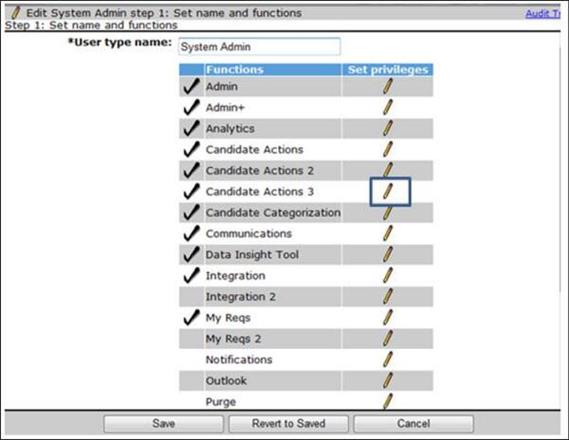
Select the Set privileges pencil icon for Candidate Actions 3 to open the Edit System Admin step 2: Set Candidate Actions 3 privileges page.
Figure 8. Workbench - Set privileges
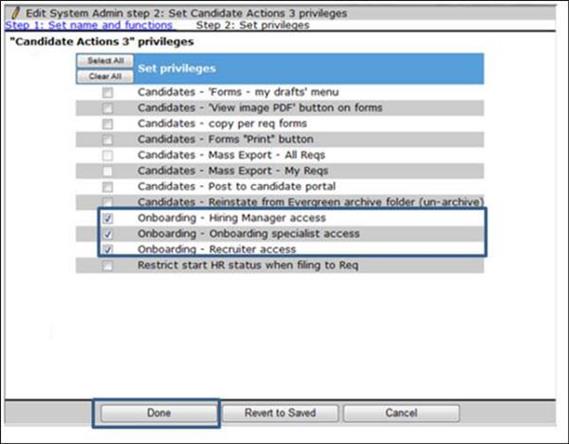
Select the applicable checkboxes for the Candidate Actions 3 privileges then select Done once complete.
Onboarding - Hiring Manager access
Onboarding - Onboarding specialist access
Onboarding - Recruiter access
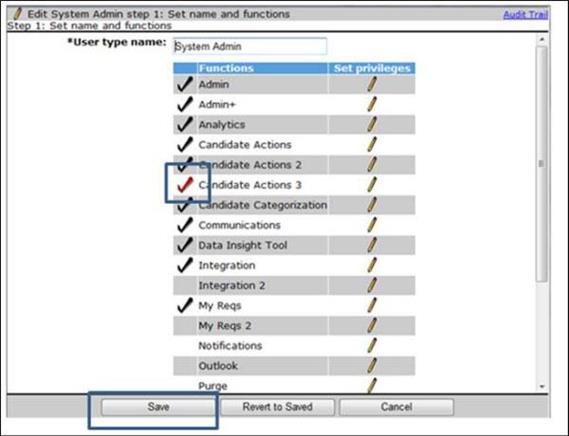
On the Edit System Admin step 1: Set name and functions page the checkmark will appear red indicating the change you made.
Select Save to save all changes.
Figure 9. Set privileges - complete
