- 05 Mar 2024
- 6 Minutes to read
- Print
- DarkLight
Add, Edit, and Delete Roles
- Updated on 05 Mar 2024
- 6 Minutes to read
- Print
- DarkLight
BrassRing Custom Approval Workflow workflows rely on two types of roles for approval routing:
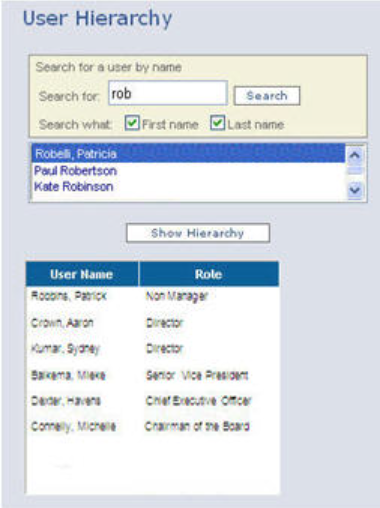
Hierarchical roles are imported from your HRIS or other systems that specify the organizational hierarchy of the reporting relationships in your company. To see a user's place in the organizational hierarchy, see Viewing the Hierarchy.
Mapped functional roles are supplemental roles that are required for approval routing. For example, suppose a company requires the Controller to sign off on every requisition or offer. The company's IT Manager creates a requisition for a new database engineer. Because the IT Manager's hierarchy does not include the Controller, the Controller role must be mapped to the IT department so the Controller can be part of the workflow to approve this requisition. You create mapped functional roles in BrassRing Custom Approval Workflow. You can map functional roles to a single organizational unit, such as a department, or to an entire organization.
This topic describes how to perform the following tasks for mapped functional roles:
Adding a Role
On the Admin tab, select Roles > Roles > Add/Edit/Delete roles.
Select the Add button.
Type a descriptive name for the role in the Role name box.
Select the Save button.
Editing a Role
Changing the name of a role does not affect running or completed workflows.
On the Admin tab, select Roles > Roles > Add/Edit/Delete roles.
Select a name in the Roles list, and then select the Edit button.
Edit the name of the role in the Role name box.
Select the Save button.
Deleting a Role
Deleting a role does not affect running or completed workflows.
On the Admin tab, select Roles > Add/Edit/Delete roles.
Select a name in the Roles list, and then select the Delete button.
BrassRing Custom Approval Workflow asks you to confirm that you want to delete the role. select OK to delete the role from the system or select Cancel to leave the role unchanged.
Viewing Role Assignments
Use the View Role Assignments screen to view all mapped functional roles for a specified user and to optionally reassign selected roles to another user.
On the Admin tab, select Roles > View role assignments.
Select the workflows you want to work with. By default, all workflows are selected.

Under Select User to View, search for a user whose roles you want to view.
Select View Assigned Roles.
(Optional) To reassign selected roles to another user, see Reassigning Roles.
(Optional) To delete a role assignment, select the check box next to it and select the Delete Selections button.
Assign Roles
Use the Assign Roles screen to view functional roles mapped to a specified organizational code combination and to assign users to those roles.
To assign roles to users:
On the Admin tab, select Roles > Assign roles.
Select the workflows you want to work with. By default, all workflows are selected.

Select a combination of organizational codes. Select at least one code value or wildcard option for Code1, Code2, and Code3 (and up to five selections for each organizational code).
Select View Assignments.
(Optional) To delete a role assignment, select the check box next to it and select the Delete Selections button.
Now that you have seen the roles that are mapped to the combination of organizational codes you chose, you can assign users to these roles.
Select a role to assign.
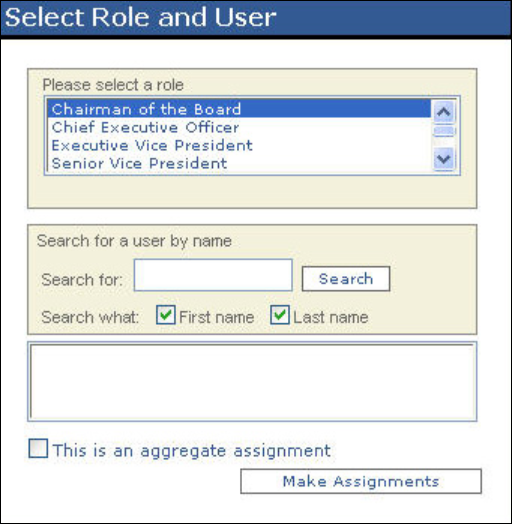
Search for a user to assign the role to.
Select the Make Assignments button.
Reassigning Roles
You can reassign roles from one user to one, some, or all users. For example, you'd want to reassign all the roles of a user who leaves the company or takes a job in another division.
Effect of Reassigning Roles
Reassigning a role replaces the previous user with the new user in all mapped roles and approvals with the status Waiting on Me for the current user. Reassigning roles does not affect workflows that the reassigned role has already approved, but it does affect workflows for which the reassigned role is still in the approval queue.
For example, suppose the Controller role is defined as the fourth approver for a requisition and is assigned to Robert Foley. If a new employee named Peter Chat is assigned the Controller role before it reaches the Controller role, BrassRing Custom Approval Workflow automatically routes the requisition to Peter Chat, not Robert Foley.
This topic describes how to:
Reassign specific roles from one user to another
Reassign all roles from one user to another
Reassigning Specific Roles from One User to Another
On the Admin tab, select Roles > View role assignments.
Select the workflows you want to work with. By default, all workflows are selected.

Under Select User to View, search for a user whose roles you want to reassign.
Click View Assigned Roles.

Select one or more roles to reassign to another user.
Under Reassign Roles to User, search for a user who will get these roles.
Click Reassign Selected Roles.
Reassigning All Roles from One User to Another
Reassigning all roles from one user for another reassigns the roles for all workflows.
On the Admin tab, select Roles > Reassign user roles.
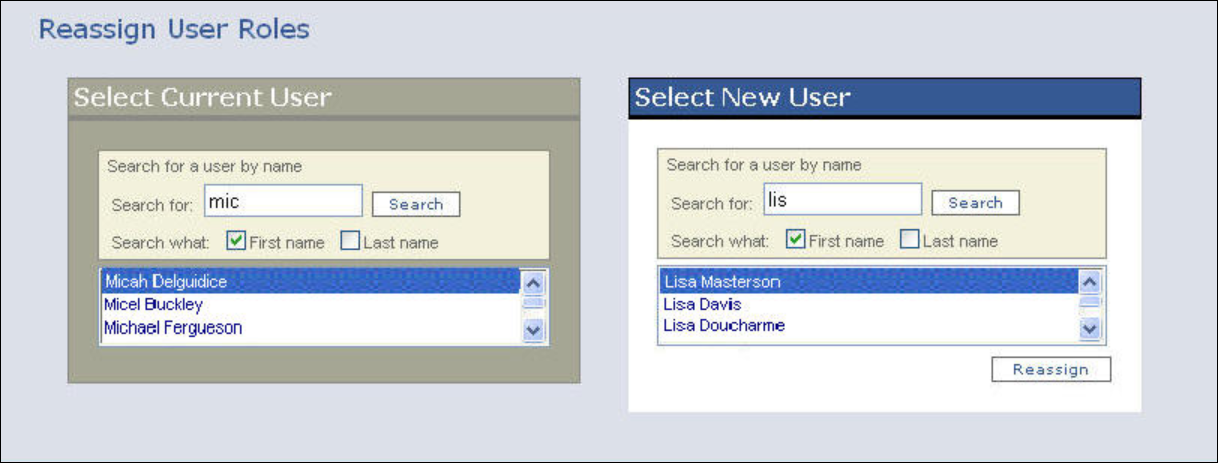
Under Select Current User, search for a user whose roles you want to reassign.
Under Select New User, search for a user who will get all the Current User's roles.
Scroll through the list of users and select the user you want to view by clicking on his or her name.
Click the Reassign button.
Click OK to reassign the roles or click Cancel to leave the role assignments unchanged.
Defining Mandatory Roles
Mandatory roles help to ensure that minimum levels of management are included in approval routing. Mandatory roles:
Are required and cannot be removed from the approval chain in a workflow.
Apply to the entire organization for each workflow, no matter what level of the organization they are assigned to in the Assign roles screen.
To define mandatory roles:
On the Admin tab, select Roles > Mandatory roles.
Select a workflow from the drop-down list.
BrassRing Custom Approval Workflow displays a list of roles for the specified workflow.
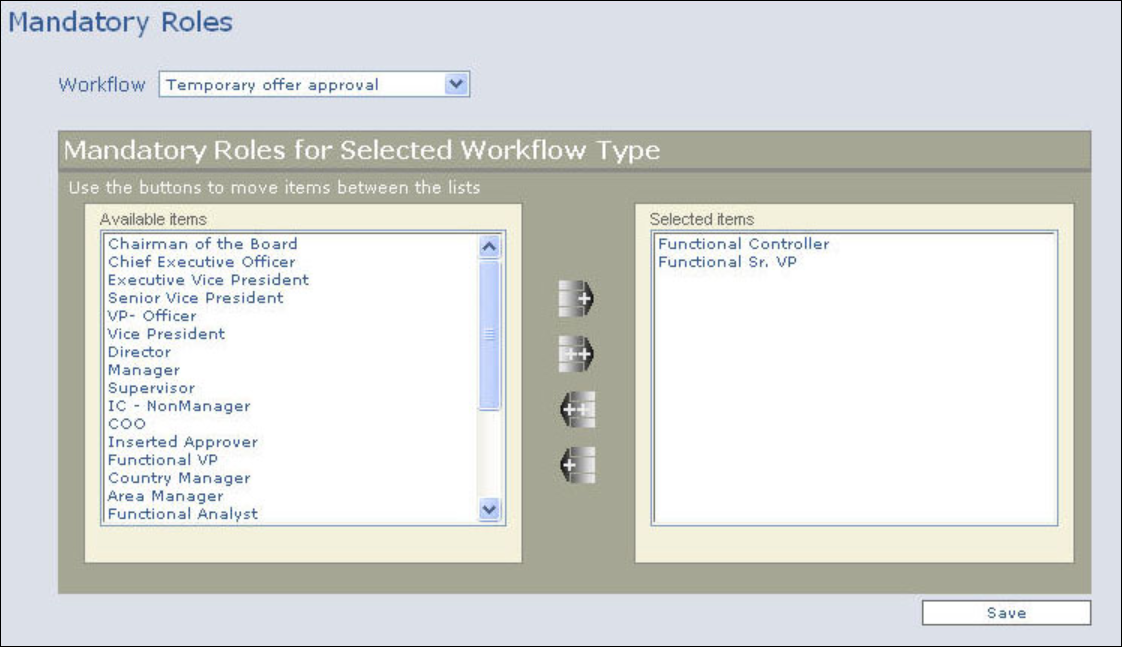
Add or remove mandatory roles:
To add roles to the mandatory roles list: Select roles in the Available Items list and select
 . To move all available roles, select
To remove roles from the mandatory roles list: Select the roles in the Selected Items list and select
 . To remove all roles from a sequence, select
  .
.Tip
To select multiple items that are adjacent, hold down the SHIFT key and select the first and last items. To select multiple random items, hold down the CTRL key and select the required items.
Select the Save button.
Defining Excluded Roles
You can exclude roles that are not appropriate for an organization's approval routing. You might exclude a role from an approval path for a number of reasons. For example, a role might exist only in three of five business units that all use the same workflow or the approval list for a smaller department might be more streamlined than the approval list for a larger department.
To exclude roles:
On the Admin tab, select Roles > Excluded roles.
Select the workflows you want to work with. By default, all workflows are selected.

Search for and select a code or a set of codes.
Select the Show Exclusions button.
The role exclusions for the selected codes appear at the bottom of the screen. The excluded roles are listed by workflow.

(Optional) To delete a role exclusion, select the checkbox next to it and select the Delete Exclusions button.
Now that you've seen the roles that are excluded from the combination of organizational codes you chose, you can select other roles to exclude.
On the right side of the screen, select the roles from the Select Exclusions box. Select the Select All checkbox to exclude all of the roles.
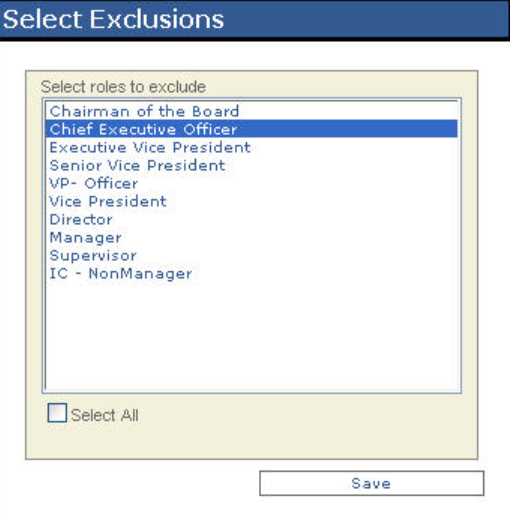
Select the Save button.
Ranking Roles
A role's rank determines the hierarchy of approval levels when business rules are evaluated for approval. For example, if a business rule's action is to compile all the roles up to Vice President, BrassRing Custom Approval Workflow compares the current approver's role to the role ranking to determine if another level needs to be added to the approval chain.
Ranking roles is a one-time administrative setup function. To rank roles:
On the Admin tab, select Roles > Role Rank.
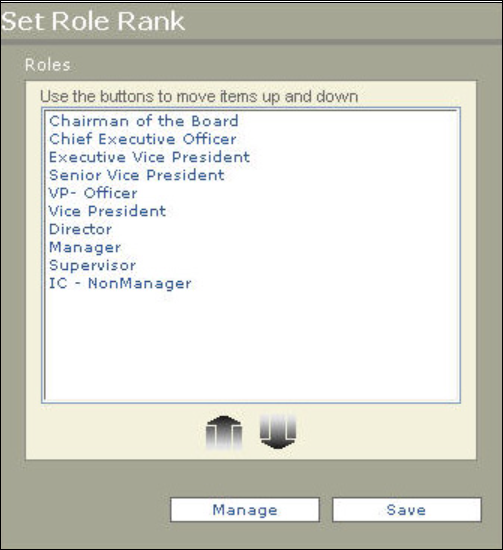
Select the role you want to move up or down in the ranking list.
Select
 or
or  .
.Select the Save button. To return to the Add/Edit/Delete Roles screen without saving any changes, select the Manage button.
Viewing the User Hierarchy
User Hierarchy displays the names and hierarchical roles of a specified user's reporting chain. The hierarchy you see in BrassRing Custom Approval Workflow reflects the hierarchy in your organization's HRIS. You cannot edit the hierarchy in BrassRing Custom Approval Workflow.
To view the user hierarchy:
On the Admin tab, select Roles > User Hierarchy.
Search for a user to work with.
Select the name of the user whose hierarchy you want to see.
Select the Show Hierarchy button.
BrassRing Custom Approval Workflow displays the reporting hierarchy, starting with the user you selected.
