Abstract
Product: Acoustic Campaign
Adding or editing content on a Landing Page
Relevant eLearning:
Process:
Adding Content to the Landing Page
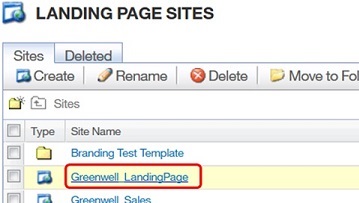
To add content to a Landing Page, select Menu → Landing Pages.
On the Create Landing Pages Site page, select the Landing Page site to open it.
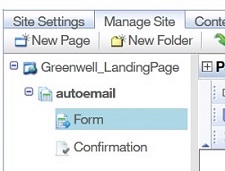
In the Manage Site tab, select the Form to add content to.
Use the design editor to add your Landing Page content. This editor works like any text editor such as Microsoft word. Use the controls to insert and format the text of your email.

Select Save to save changes.
Creating the template by using HTML
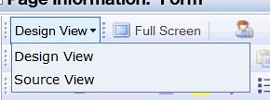
To create the Landing Page by using HTML, select Design View → Source View. If you have no experience with HTML code, edit the content in the standard view.
Adding Graphics
Select where the text, or image, is to display, and select Edit/ Insert image

In the Image properties window, select whether to upload a new image or reference a remote image. Remote images are images that are stored elsewhere on the internet.
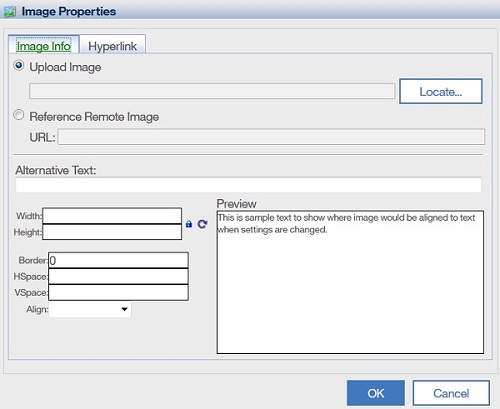
Complete the rest of the form, and select OK.
To change the position of an image, drag it to a different location on the template.
Use the standard formatting options that are presented to justify, or resize, added images.
Inserting content from the Asset Library
Place the cursor in the text where you want the text or image to display.
Hover over the Asset Library icon, and select Load Asset from Library.

In the window that opens, select the asset and select Insert.
PDF documents do not appear in the list from the Asset Library. PDF documents must be added as a Link.
Adding a Link
Select the hyperlink symbol.

The Link Properties window opens.
Insert the Link Name.
Select the appropriate link type by using the pull-down menu.
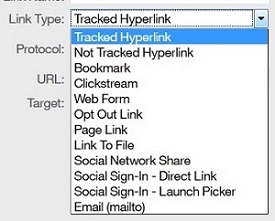
Standard Hyperlinks can be tracked or not.
Link to File is used to Select a File from the Asset Library to link to.

Email (mailto) opens a new email in the Leads default email client.
Complete the rest of the window, and select OK.
Editing the Form
Select the Form Settings icon

.
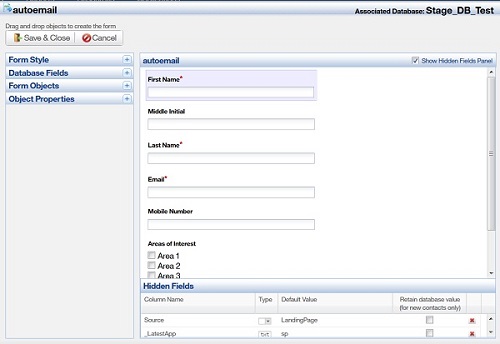
Expand the Form Style section by selecting the plus
 .
.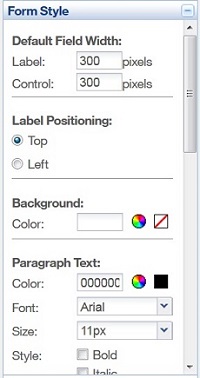
The Form Style is used to set how the form appears on the page. Use these options to set the size, colors, and fonts.
Expand the database Fields section by selecting the plus

.
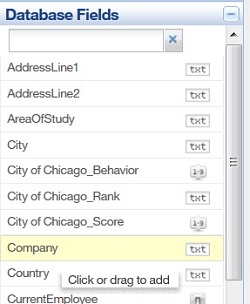
Select a field in the database Fields to add it to the form.
Drag fields to rearrange the fields that are shown.
Select a field to open the Object Properties.
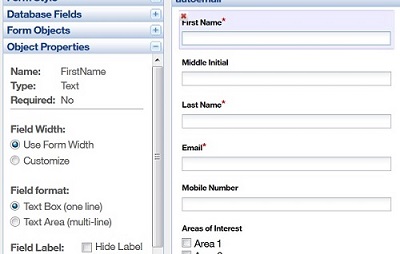
Set the label and label format.
To set the field as required, check Make field required on form. The form cannot be submitted without the Lead completing required fields.

Add the _LatestApp to the Hidden Fields section.
To add this hidden field, drag the field to the Hidden Fields section.
Select the _LatestApp field to open the properties.

Insert SP as the Field Default Value.
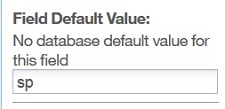
_LatestApp is required to sync the form fields with Lead Manager.
Continue adding the fields to the form, and setting their properties.
Select Save & Close.

