Abstract
Product: Infinite BrassRing
Managing Communications
Communication templates are created by system administrators and used by recruiters to contact one or more candidates electronically from within BrassRing on Cloud. The templates are typically created for messages that are sent repeatedly to candidates, advancing your company's relationships with them. For example, Communication templates can be used to thank candidates for interviewing, to gather application and EEO data, and to inform candidates of an upcoming recruiting event.

Relevant eLearning
Process
Add a Communication template
This process requires Admin access.
Select Menu → Admin → Communications → Add communication template.
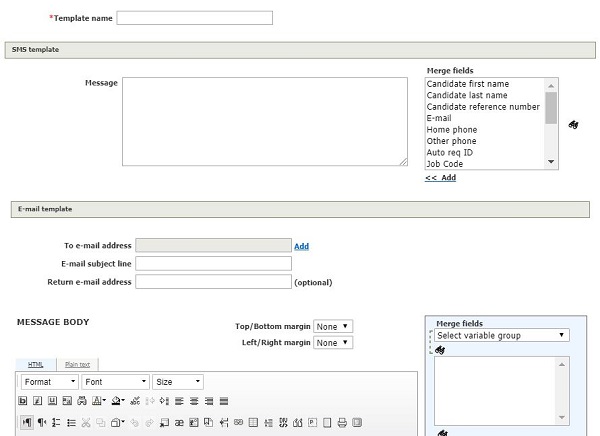
Insert a template name.
Insert a subject for the template. Hovering over the field displays standard tokens that can be used in the subject line of your communication template.
To add a merge field to the subject, select the Merge Field in the [Merge fields] section, select [Email Subject], and select Add. Updated Build 20.03.09.
Insert the default Return email address. If this field is left blank, it is later populated automatically with the sender's email address.
Insert and format the Message body for your template. You can compose the email message in a word-processing application if wanted, then copy and paste the text into an email template. However, if you want hard line breaks, you must put them in after you paste the text. Copying and pasting from Word can often carry over hidden HTML. If you choose this method to create your communication template, it is necessary to perform a test before starting to use the template for your active candidates.
Insert merge fields by selecting the variable group by using the pull-down menu, selecting the merge field, and selecting Add.
Insert a link to a Talent Gateway by selecting a Talent Gateway Type, selecting the Talent Gateway, and selecting Add.
Insert a form to complete or view by selecting a Form, and selecting Add in the appropriate section.
Insert a link to a form to complete or view by selecting a Form, and selecting Add URL in the appropriate section.
To add eLinks to the Talent Record, check Add Talent Record eLinks, and select the sections as needed. When sending communication with the [#elink:Talent Record#] token, the template attributes Send to: Other recipients is selected by default and the Send to: Candidates option is disabled.
Insert a blurb by selecting a Blurb, and selecting Add. Preview the blurb text by selecting the blurb, and selecting View text.
To add attachments, select Choose Files, select the files on your computer, and select Upload.
Set the Template Attributes:
Select the Org groups authorized to send this template and the Org groups authorized to administer this template.
Select Active Template Yes to ensure that the template is active and available to be selected.
Select the Template type.
Select Yes if the template is to be used for Agency Manager.
Confirm your email template is Active, and whether it is to be used with Agency Manager.
Select the Sending method:
Manual Send makes the template available in the list of email templates when the user selects Send communication.
Auto Send makes the template available only for use with Automation Manager and Rules Automation Manager, and does not appear in the list of email templates in the Send communication workflow.
Auto and Manual Send makes the template available from the Send Communication workflow and by Automation and Rule Automation Manager.
Select Yes to Save copy of correspondence to save a read-only copy of correspondence created from this email template on each candidates Talent Record. This option is only available if the user has the permission to save a copy.
Select Save.
Select OK.
Edit a Communication Template
To edit a communication template, select Menu → Admin → Communications → Communicaton templates.
Select the Edit icon.
Update the template as needed, and select Save.
Deactivate a Communication Template
To deactivate a communication template, select Menu → Admin → Communications → Communicaton templates.
Select the deactivate icon for the Communication.
Select OK.
View Inactive communications
Select Menu → Admin → Communications → Communicaton templates.
Select Filter → Inactive.
Delete a Communication Template
It is best practice to deactivate rather than delete a communication template.
To delete a communication template, select Menu → Admin → Communications → Communicaton templates.
Select the delete icon for the Communication.
Select OK.