Abstract
Product: Workbench.
Configure Posting Defaults
This process describes configuring default values for the posting options screen in BrassRing on Cloud by importing a template into BrassRing on Cloud Workbench. Job Code Default Data must be configured before this process is carried out.
Relevant eLearning
Process
Downloading and Completing the Template
Download the job code posting defaults by selecting Tools → Forms → Reqs → Req Forms.
Select Administer Req Fields for the Req form to have the default posting options.
Select Export job code Posting defaults to Excel.
Insert a name for the file and select Launch.
Access the file by selecting Tools → Task Manager.
Select the View Binoculars icon for the Task Name that was entered.
Open and Save the spreadsheet as needed.
Select the Defaults tab, and insert a new column A.
Add the title to the new Column A as Import Action.
For each line item, insert the details that are to be the default values.
Insert Update or Delete in the The Import Action values, depending on whether you are updating the line item or are marking it for deletion.
The columns in the file correspond to the posting options that are presented when opening a Req. For example, Site Name is the Gateway site.

The Posting Options can be defaulted by adding details of the required details to Columns F to M. These headings correspond to the options on the Posting Options window.

Save the template.
In Workbench, select Tools → Import → Profiles.
Create a New Import Profile or use an existing Import Profile to import your spreadsheet.
Creating a new Import Profile
It is not required that a new profile is created every time there is an import to run. It is recommended to create one profile per Import Type.
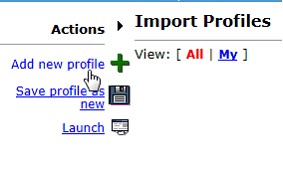
Select Add new profile.

Complete the Import Profile page.
Name your Profile. It is recommended that you name the profile the type of import you are planning to run.
Select Sharing if you would like other Workbench users to see your Import Profile.
Select JCDD – Posting Defaults.
Select your file by selecting Browse.
Select Next.
Complete the Map Import Profile page.
The Column Name shows the standard option import columns necessary for the import.
The Map To column shows the column headers that are present in your Excel sheet. It is recommended to review the Map To column to ensure that there is a column header for each of the standard option import columns. It is recommended that you do an initial export of the current Option List to get the layout needed to be imported. Having the proper column headers on your spreadsheet ensures that your Map To column aligns correctly.
The Overwrite column is used to select the fields you would like to overwrite the option data for. Selecting All checks each box automatically.
Select Finish.
If you would like to complete the Import process select Launch. If you would like to come back later to complete the steps, select Close.
Selecting Launch opens the Launch Import Profile window.
The Import Type is defaulted to JCDD – Posting Defaults.
Reselect your spreadsheet.
Select Launch.
The system processes the spreadsheet and sends you an email when the import is complete. See Completing the Process for more information.
Launching an existing Import Profile
It is not necessary to create a new profile every time there is an import that is needed. It is recommended to create one profile per Import Type. Should you already have created an import profile, double-check the settings and the mapping of the profile and use that for your future imports.
Select the existing profile and select Launch.

Selecting Launch opens the Launch Import Profile window.
The Import Type is defaulted to JCDD – Posting Defaults.
Reselect your spreadsheet.
Select Launch.
See Completing the Process.
Completing the Process
The system processes the spreadsheet and sends an email when the import is complete.
Select Tools → Task Manager.
On the Task Manager page, there is a Status column that indicates the status of your import. There are five potential Statuses you can encounter:
Pending. The import is waiting in line to be processed.
Running. The import is being processed. You can select Refresh display link to watch the progress. The number of rows increases as the file is processed.
Completed. The import has been completed without errors. However, it is important to open the file by using the binoculars icon to review the results.
Completed with Errors. The import has completed and has errors that need to be resolved. Open the results file by using the binoculars icon, review the errors, correct them in the original file, and reload the file. You can reload the entire original file, with the corrections, or just the JCDD that had to be corrected.
Failed. The import failed completely. This can be an issue with the extension of the Excel file that you attempted to import, an overall system error or issue, or that the file was too large and timed out. See Reading the Results file and Common Errors for more information.