- 28 Feb 2024
- 1 Minute to read
- Print
- DarkLight
Enable WOTC Location Settings in BrassRing to Onboard Integrations
- Updated on 28 Feb 2024
- 1 Minute to read
- Print
- DarkLight
Abstract
When screening an individual, the location determines if the individual is screened for WOTC or WOTC plus other federal and/or state credits.
Ernst & Young’s survey is dynamic and is driven by the location. When recording the results, the location is used to associate the applicant/hire with a corresponding location in the client’s Ernst & Young database.
Create a field in BrassRing that contains all the WOTC location options that your WOTC contact provides you, and then map that field to the requisition templates that will leverage WOTC.
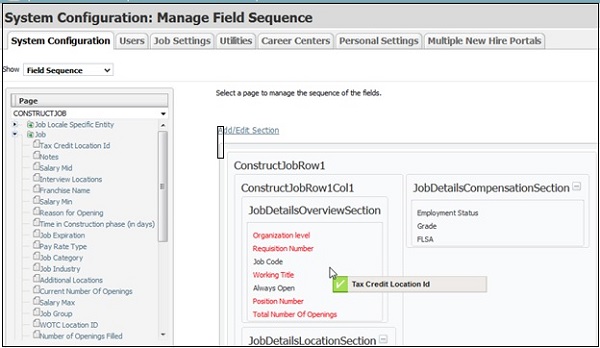
Add the Tax Credit Location Id field to JobDetailsOverviewSection under the CONSTRUCTJOB page. To do so, go to Settings > System Configuration > Field Sequence CONSTRUCTJOB, and drag and drop Tax Credit Location Id field to JobDetailsOverviewSection.
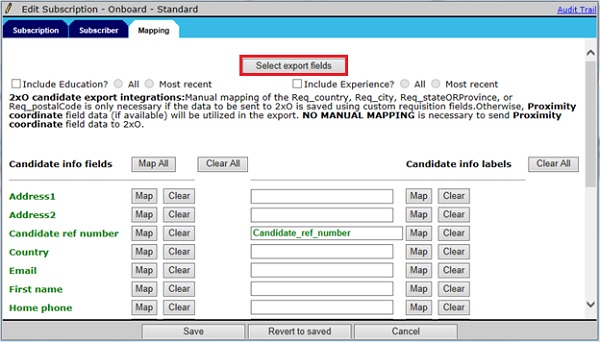
In the BrassRing Workbench Subscription, map this new field to your Onboard Candidate Exports from the Mapping Tab. To do so, go to Tools > Integrations > Administration > Subscription Admin > Edit settings > Mapping, and select Select Export Fields to pick the custom field you want to map to Onboard.
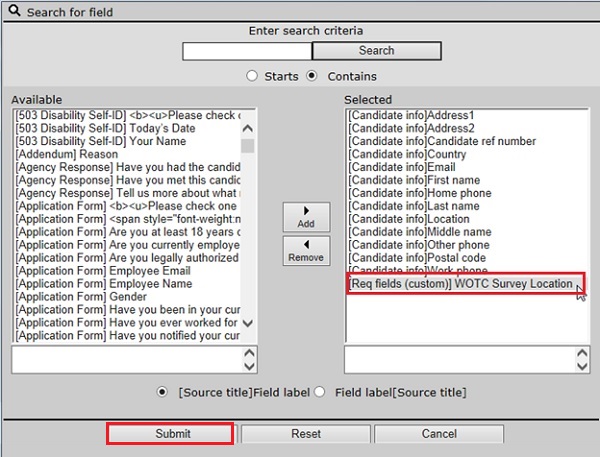
Add the Req field to the subscription and select Submit.
The field now displays on the Mapping tab.
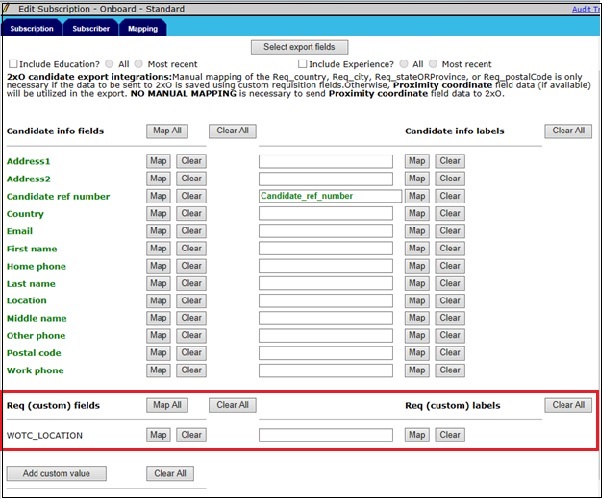
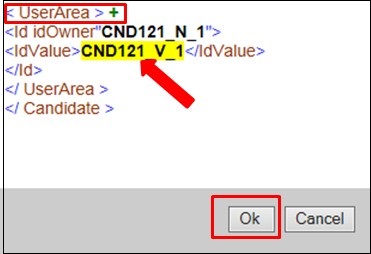
Select Map for your custom req field for BrassRing and select the next available IdValue in the UserArea Section. In this case, CND121_V_1 is the next available value. Highlight it and select Ok.
Enter EMPLOYEE_TAX_CREDIT_LOCATION_ID in the custom Req field for Onboard.

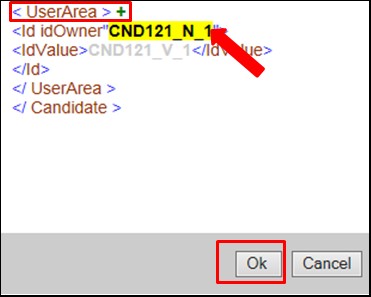
Select Map for the custom Req field for Onboard and select the next available IdValue in the UserArea section. In this case, CND121_N_1 is the next available value. Highlight it and select Ok.
Mapping is complete when both fields are GREEN. Select Save.

Work with PSE to have the xpath updated on your customer’s .xslt document to reflect this change. If you are comfortable enough with this yourself, you should add the following between the JobRequisitionEntity tag and the JobRequisitionEntity tag:

