How to Set up Google Analytics
Google Analytics can be set up in two ways The Global Website Tag (gtag.js) or Google Tag Manager.
The easiest way is to use The Global Website Tag.
This tutorial will use the Global Website Tag approach.
Set up Google Analytics: The Global Website Tag
Step 1: Create a Google Analytics account
Go to Analytics: Create an account or sign in to Analytics
The link in the paragraph above takes you to the Google Analytics landing page.
Click the "Start for free" button.

Step 2: Enter the welcome page
You are welcome to use the solution after creating an account or signing in.
Click the "Start measuring" button to proceed.

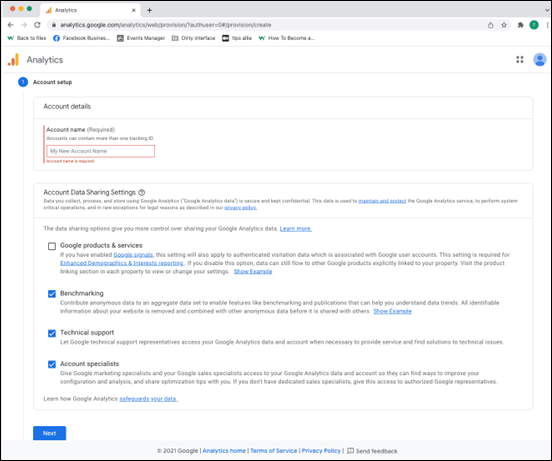
Step 3: Account setup
You have two decisions to make here.
Enter your account name.
Decide what data you want to share.
Click the “Next” button.
One account can have more than one tracking ID. You can track more than one website with an account.
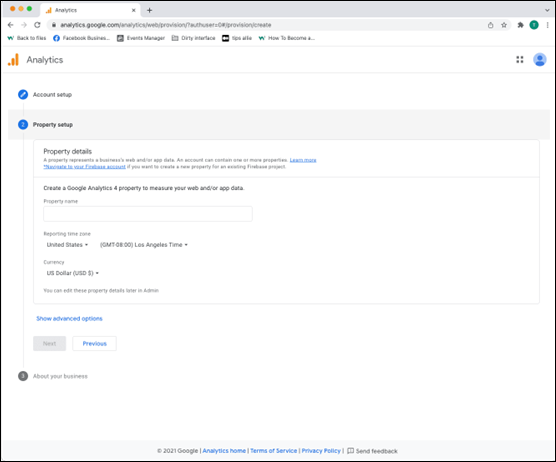
Step 4: Property Setup
Property is the service you measure, such as a website, application, link tree, etc.
Enter a property name.
Enter your time zone.
Enter the currency that you use.
Click the "Next" button.
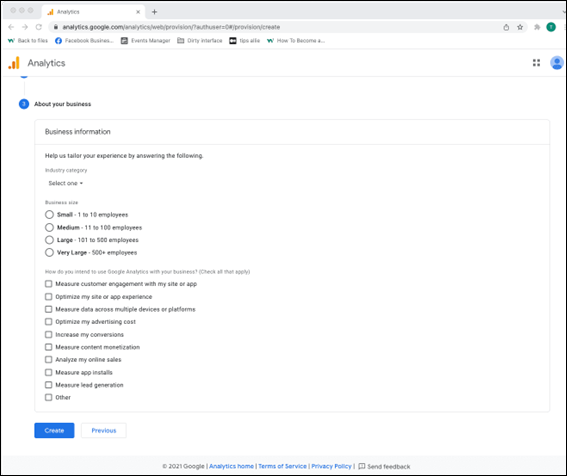
Step 5: Add business information
Analytics uses the information to tailor your experience.
Select your industry category.
Select a business size.
Tick the boxes for how you are planning to use Analytics.
Click the "Create" button to proceed.
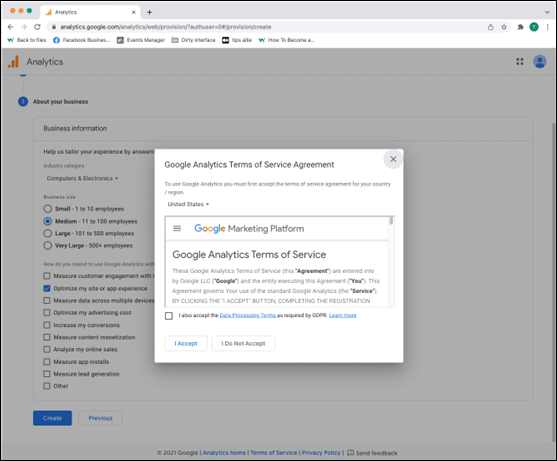
Step 6: Terms of Service Agreement
Read and understand the terms of service.
Tick the GDPR box and click the "I accept" button if you agree.
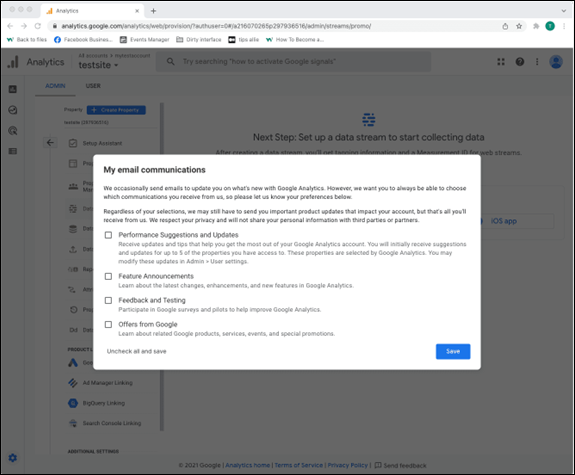
Step 7: Email subscriptions
Tick or uncheck all boxes.
Click the "Save" button to continue.
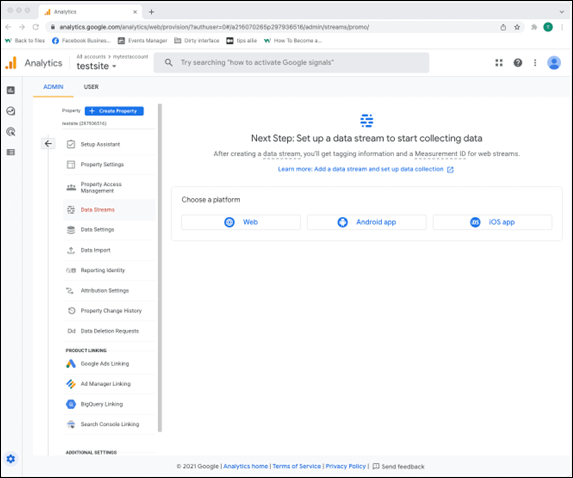
Step 8: Select the platform
Choose the platform where you are collecting data.
Then, click the relevant platform to continue.
We are continuing with "Web" as the example in this tutorial.
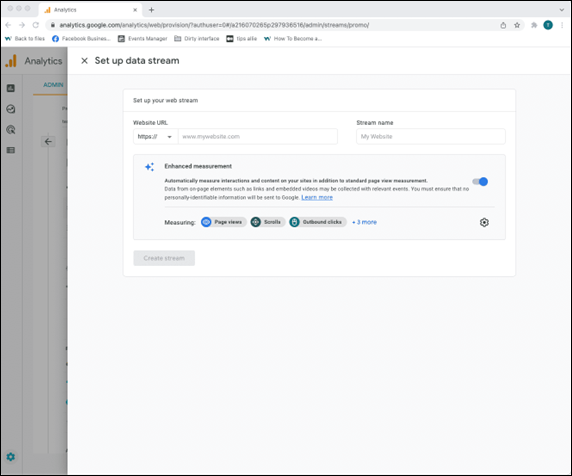
Step 9: Data stream setup
Enter data stream details.
The URL to your site.
The name that you want to give the stream.
Decide if you are to enable enhanced measurement or not.
Click on the "Create stream" button to continue.
The enhanced measurement can give the data more context. Improving your understanding of the traffic.
Step 10: Webstream overview
Here you can see a detailed overview of the web stream.
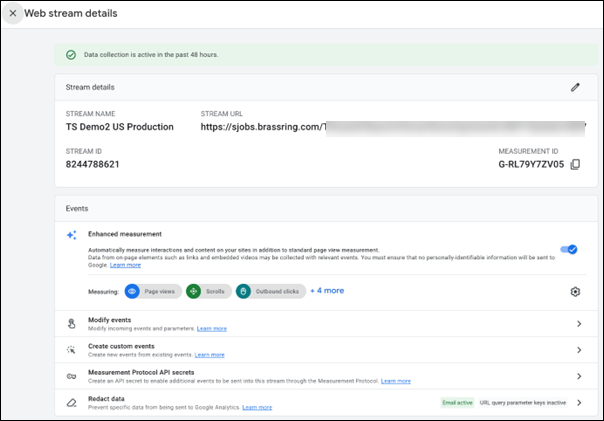
Here are the key takeaways from the overview.
Stream URL. The Stream URL is the link to the connected site.
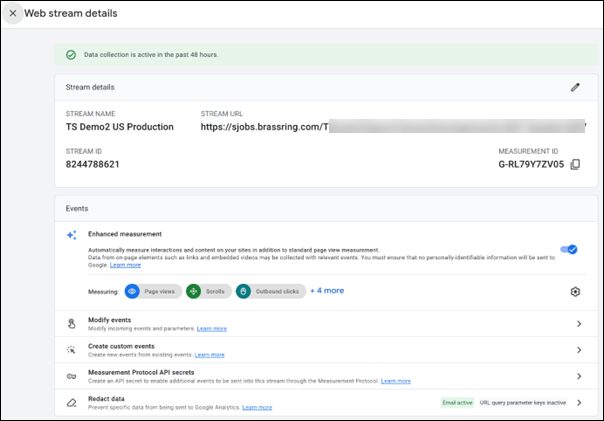
Measurement ID The Measurement ID is the identifier for your data stream.
It has a format of G-XXXXXXX.
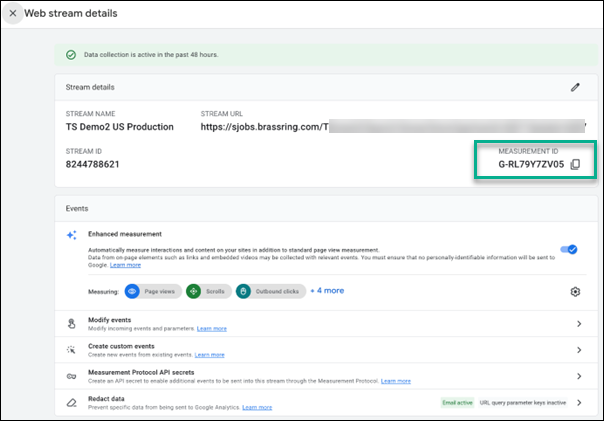
Google Analytics 4 uses Measurement ID. Older versions use Tracking ID. You cannot have both.
Tagging instructions
Decide to use Global site tag (gtag.js) or Tag Manager.
This tutorial will use the Global site tag.
Installing the Global site tag is the easiest and quickest way of getting it up and running.
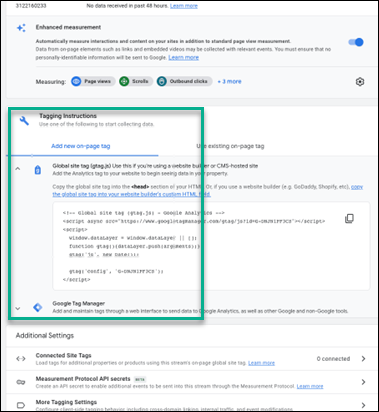
Step 11: Global site tag (gtag.js)
Click the "Global site tag (gtag.js)" row.
.png)
Here you can see a code snippet.
The code snippet is a script allowing Google to measure your site's data.
You can see the Measurement ID in the second last line in the code snippet.
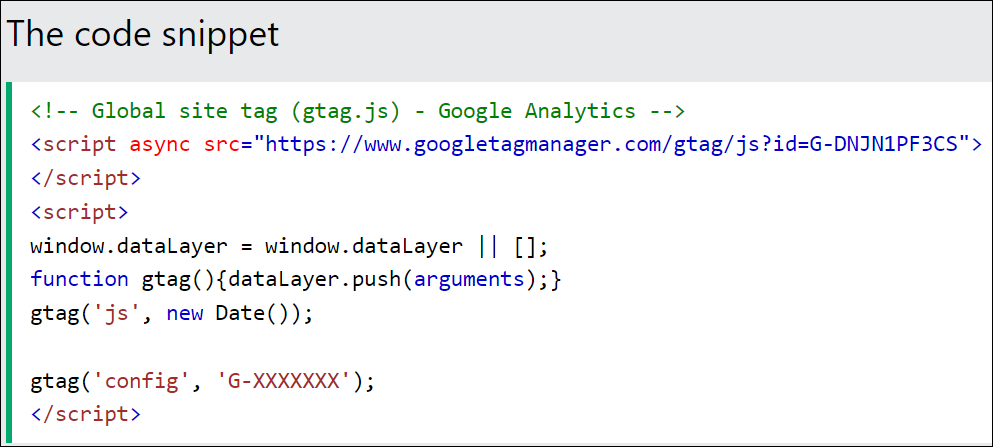
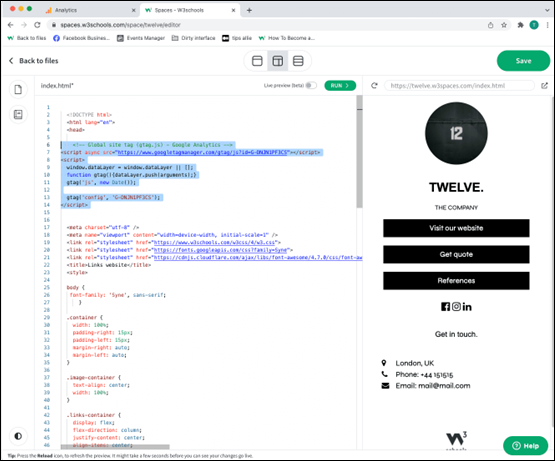
Step 12: Enter the code snippet
Copy the code snippet.
Make sure to include your Measurement ID.
Locate the <head> tag in your HTML.
Paste the code snippet just below the <head> tag.
Save and publish the code.
Step 13: Test that it works
Ensure you have successfully saved and published the code snippet with the correct Measurement ID.
Open the URL for the site you have connected to the data stream.
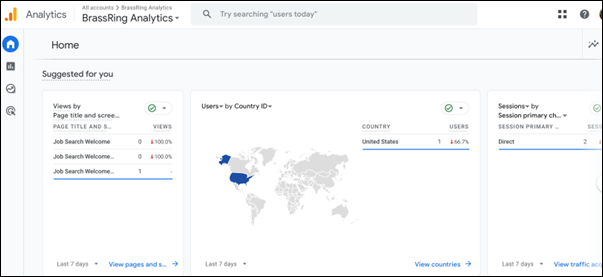
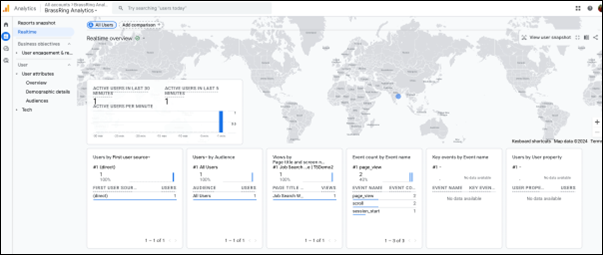
Click on "Real-time" on the menu to the left.
Confirm that you see yourself as an active user.
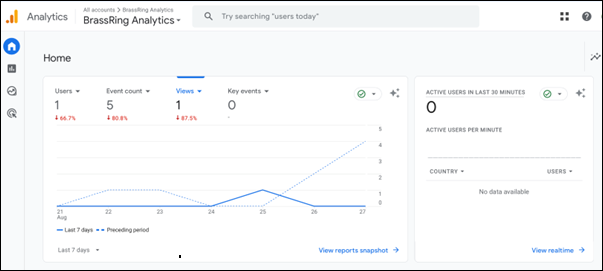
Congrats. You have successfully enabled Google Analytics for your site!

To insert a script in Gateway Questionnaire pages:
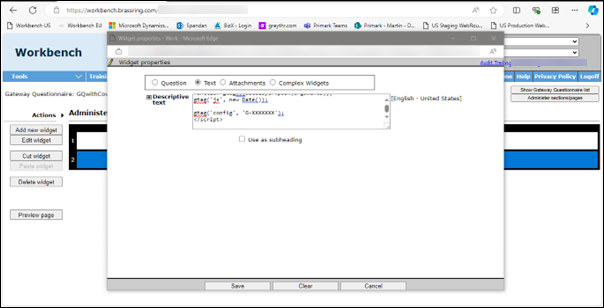
In the Gateway Questionnaire, the script is placed in the text widget.
Path: Workbench->Tools->Gateway Questionnaires
If the gateway questionnaire is active, change its status to "draft" to make the changes, such as inserting the script.
Administer sections/pages->Administer Widgets
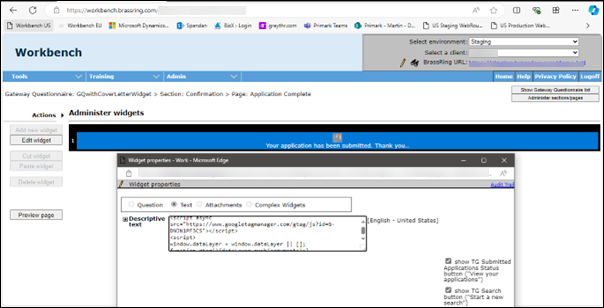
For example, the first page or Submission page, etc… based on client requirements.
After adding the script, save, activate, and update the Gateway Questionnaire.
Test whether the script is executing correctly.
If the script does not execute as expected, modify it and repeat the process.
Please continue this cycle until the script consistently executes on the designated page.
To insert a script in Talent Gateway:
To insert a script on the Talent Gateway home page, logged-in landing page, search results page, or job details page, please reach out to the Global Support Centre or Infinite Representative to create a maintenance request.