- 06 Mar 2024
- 2 Minutes to read
- Print
- DarkLight
Google Calendar Integration
- Updated on 06 Mar 2024
- 2 Minutes to read
- Print
- DarkLight
Abstract
Product: BrassRing on Cloud
Google Calendar is part of the G Suite, a cloud-based subscription service that allows organizations to create, communicate, and collaborate by using Google tools. Infinite takes no responsibly for the content in third-party programs, and the process on this page might not accurately represent the Google system. Infinite is not responsible for the content on third-party websites.
Connecting to your Calendar
The Manage Schedules page in Interview Manager is used to select the interviewers for an interview and look up their real-time availability based on their Google calendar. The free or busy schedules can be viewed for any BrassRing user and those that have shared their calendars with the BrassRing user. Connect your calendar allows the BrassRing user to log in to their Google account and give consent to the BrassRing application to access the organization calendar.

Calendar Integration Configuration Types
Clients must register their own app in the Google developers console and then enter the Application ID, and Application Secret in Workbench. There are three integration types:
Basic. BrassRing provides an inbuilt Google app to validate the integration. It is only intended for testing and validating the integration by connecting to the organization’s Google calendar, giving consent to the BrassRing app, and getting the free or busy schedule of the users in their organization.
Advanced. Advanced configuration should be used for the production environment. With the Advanced configuration, there are two consent options available:
User Consent. The users must sign in to their Google account by using the Connect your calendar option and provide the consent. For more information, see Calendar Integration.
Admin Consent. The user is signed in to their Google account by using their BrassRing user email ID and they can obtain the free or busy schedules of any user with the domain.
None. This is the default option and means that there is no integration.
Configuration Process
Configuring Google Calendar
Access the Google developers console here, and log in by using your credentials.
Select NEW PROJECT.

Select Menu → Dashboard.
Select Enable APIs And Services.

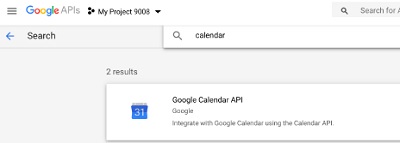
Search for [calendar] and select Google Calendar API.
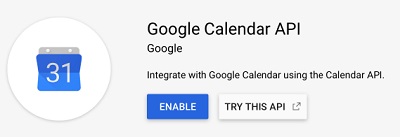
Select Enable.
Create a Service Account
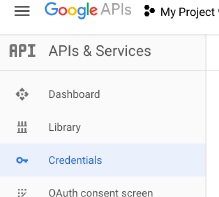
Select Menu → Credentials.
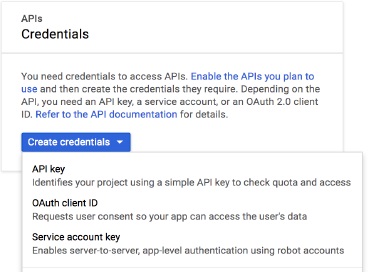
Select Create credentials → Service account key.
Insert a Service account name and select Create.
Optionally, insert any user details into the [Grant users access to this service account] field.
Select Next.
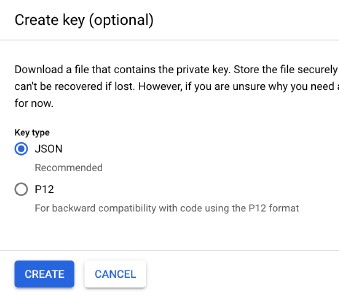
Select Create Key.

Select Key type → JSON and select Create. The .json file downloads.
Edit the Service Account
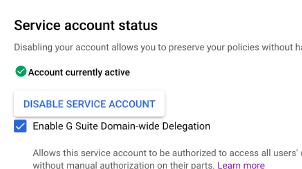
Select the edit pencil icon for the newly created Service Account.

Select Enable G Suite Domain-wide Delegation, and select Save.
Select Menu → Credentials.
Select the Copy icon for the [Client ID] in the [OAuth 2.0 Client IDs] section.

Authorize the Calendar API
Access the Google Admin console here, and log in by using your credentials.
Select Security → More Settings → Advanced Settings → Manage API Client Access.
Paste the Client ID into the [Client Name] field.
Insert https://www.googleapis.com/auth/calendar in the [One or More API Scopes] field.
Select Security → Security Admin
Enable the Enable API Access setting.
Select Save.
Workbench Configuration
In Workbench, select Tools → Interview Manager → Calendar Configuration.
Select Advanced for Configuration Type.
Select Select Provider.
Select Google by using the pull-down menu, and select OK.
Copy the details from the .json file onto the page:
Insert the client_id value into the [Application ID] field.
Insert the private_key value into the [Application Secret] field.
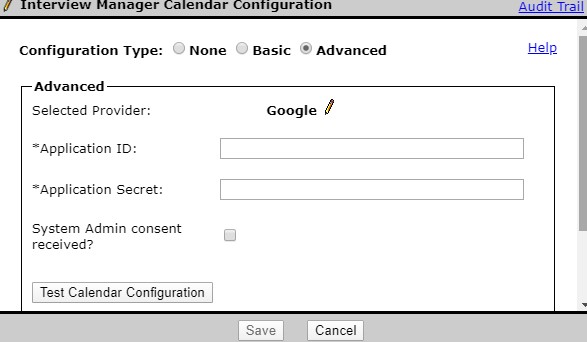
Select System Admin consent received.
Select Test Calendar Configuration. Calendars cannot be used until they have been tested.
Select Save.
