Abstract
Product: Workbench
Avature Integration
To configure the Avature integration, the Client Setting Integration Candidate Relationship Management (CRM) → Avature must be enabled. Only Infinite Representatives can enable Client Settings. Contact your organizations Infinite Representative to enable this setting.
Avature must configure the User Roles to be mapped to BrassRing User Types.
Process
Avature must provide the client’s [shortname] (account name) and the [Web Service info] (Username, Password, and Web Service URL) for both Staging and Production.
Create a manifest for the Avature Candidate Import. Select Tools → Integrations → Administration
If there is no Integration Type of [Candidate import], then select Add Integration type, select Candidate import, and select Save.
After the [Candidate import integration type] is available, select Subscription Admin icon.
Select Add subscription.
Complete the [Subscription] and [Subscriber] tabs.
The Subscription name and Manifest name must match. Up to two underscores are allowed, for example: AVATURE_CANDIDATE_UPLOAD
Select the Stacking Logic. It is recommended to select the same stacking logic as the external Talent Gateway.
An Attachment category can be selected, but it is not required.
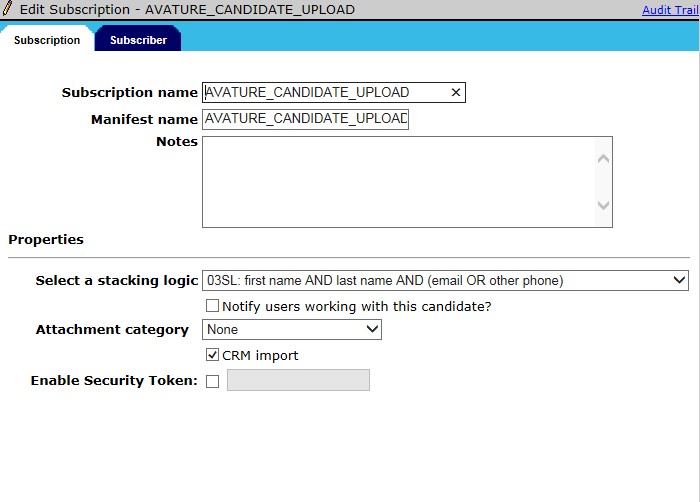
Select CRM import
On the [Subscriber] tab, select DefaultVendor.
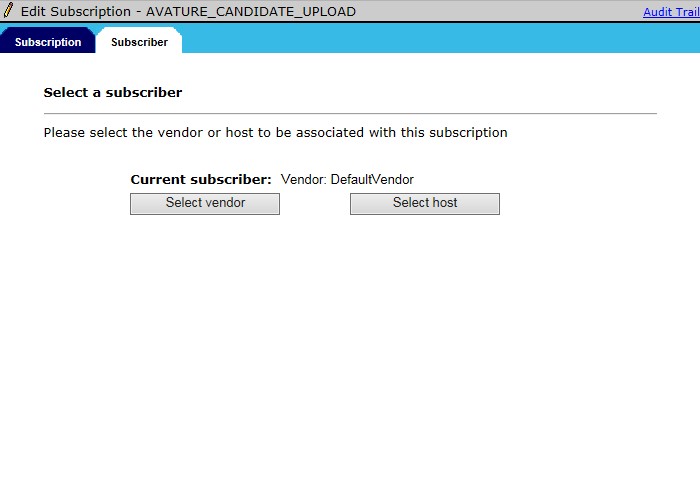
Ensure that the manifest name is provided to Avature.
Create a Source Code to be used for leads sent from Avature into BrassRing. All source codes that are sent from Avature are prepended with this Source Code. Select Tools → Settings → Code Types.
Select the Administer code list icon for the Source Code table.
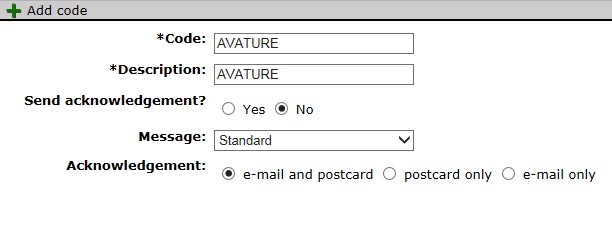
Select Add new code.
Insert the Code details as needed and select Save.
Create an Import Code. This code is attached to the candidate when they are sent from Avature into BrassRing. This code can be similar to the Source code, but cannot be the exact same. Select Tools → Settings → Code Types.
If there is no Import Code Type, select Add new code type.
Name the Code type and Description [Import] and select Save.

After the Import Code type is available, select the Administer code list icon.
Select Add new code.
Create the Import Code type, for example: [AVATURE_IMPORT], and select Save.

Open a support ticket with the following details:
[Please configure the Avature integration for the [Client Name] Staging environment. These are the details.]
[Client Short Name: [provided by Avature]]
[User Name: [provided by Avature]]
[Password: [provided by Avature]o Web Service URL: [provided by Avature]]
[Import Code: [the code created in step 9]]
[Source Code: [the code created in step 8]]
[Manifest Name: [the manifest name from the integration created in step 6a]]
[User Type Mapping: [Provide BrassRing User Type Name > Avature Role Name > Avature Role ID.]]
After the Infinite Engineering steps are completed, Infinite responds with the Integration User Employee ID Code, Credential (Client ID), manifest name, source code, and import code. These details must be provided to Avature.
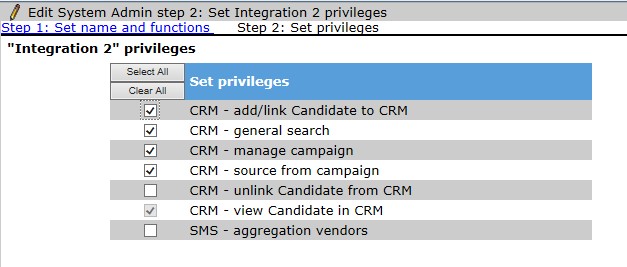
Enable the User Type settings for the user types that need to access or work in Avature. The [Unlink Candidate] feature is not available for Avature.
Select Tools → Users → User Types.
Select the Edit type permission pencil icon for the user type.
Select the Integration 2 Set privileges pencil icon.
Enable the CRM privileges and select Done.
Select Save.
Update the Talent Record ribbon configuration by selecting Tools → Users → User Types.
Select the user type and select Screen display defaults
In the pane to add the link to, select Select field and select 2xB CRM Record.
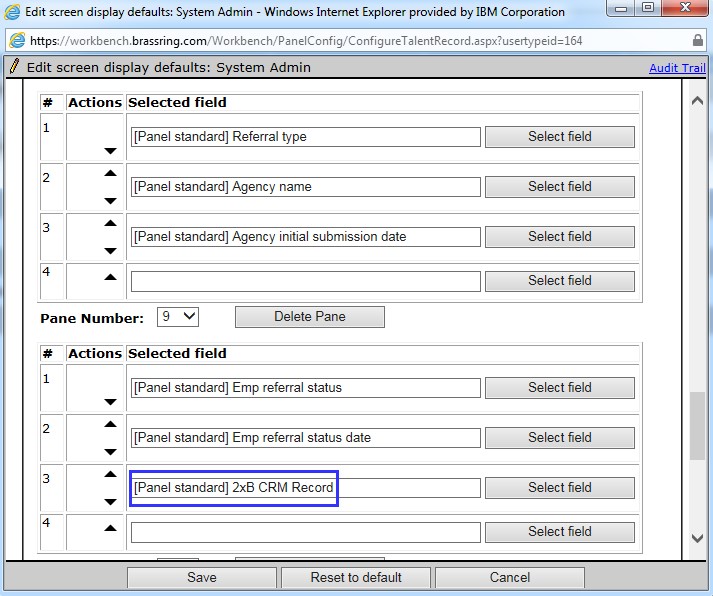
Select Save.
Enable the [Talent Gateway] setting to allow the Apply URL to be created in the campaigns by selecting Tools → Talent Gateways.
Edit the Talent Gateway to be able to pull the Apply URL for.
Enable the setting Add as job apply URL option to Posting Partners. This box might already be checked if the client is integrated with one of the posting partner vendors.
Select Save.