- 28 Feb 2024
- 1 Minute to read
- Print
- DarkLight
Manage Activity Fields: BrassRing Platform Activities Identifier Configuration
- Updated on 28 Feb 2024
- 1 Minute to read
- Print
- DarkLight
Abstract
This section describes Talent Suite activities identifier configuration steps for the Manage Activity Fields screen.
The Enable BrassRing Platform Configurations setting must be enabled in System Settings → Onboard Settings to be able to view the TS Template Type field in the Manage Activity Fields screen.
The TS Template Type field acts as a quick identifier and ready reference to identify whether an activity belongs to the Talent Suite or the standalone Onboard system, and facilitates quick migration of clients to the Talent Suite. The TS Template Type drop-down is available for E-Verify, I-9 Sections 1, 2, 3, and W-4 and State form activities.
When administrators create a new BrassRing Platform template activity, they can ignore the default Template Type drop-down list and select from the Template Type drop-down list.
Note
The BrassRing Platform template type options that appear in the TS Template Type drop-down list are driven by a new dictionary D_TS_ACTIVITY_TEMPLATE.
To access the Manage Activities Fields screen,
In the Global Toolbar, display the Settings menu and then select Settings.
Select the System Configuration tab, to display activity field configuration options.
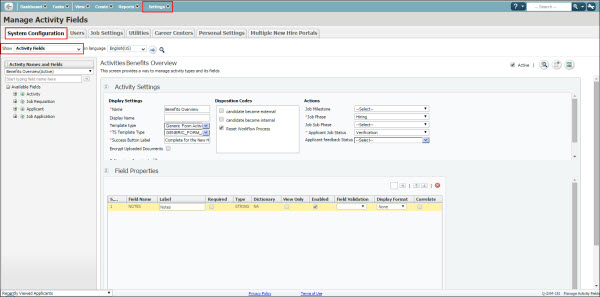
Display the Show drop-down list and then select Activity Fields. The Manage Activities Fields screen displays. The activity pane contains Activity Settings and Field Properties sections.
Figure 14. Manage Activity fields page

To create a Talent Suite field identifier,
In the Activity Settings section, select the TS Template Type drop-down.
Select the applicable BrassRing Platform template type activity.
Figure 15. Activity Settings section - TS Template Type field

Select the Save
 icon to save changes.
