- 14 Mar 2024
- 18 Minutes to read
- Print
- DarkLight
Manage Email Templates
- Updated on 14 Mar 2024
- 18 Minutes to read
- Print
- DarkLight
Abstract
Manage Email Templates is a self-service feature that allows user to manage their correspondence email templates.
Important
To turn this feature on, add user type CT_ADMIN under ADMIN access for users you want to have access.
Access to the Manage Email Templates self-service feature is based on the Manage Email Templates user type permission ( CT_ADMIN). [Refer to the ] [User Types] [ section in this guide for user-type access information.]
The user can preview, edit, test, and publish correspondence emails using the Manage Email Templates self-service feature. It is available to be used by Talent Management Solution products (Infinite BrassRing Platform, Assess, and Onboard).
Relevant eLearning.
Training and Enablement Session
Navigation
Abstract
This section describes navigation steps to access the Manage Email Templates self-service functions on the Admin User Interface (UI).
Procedure
From the Admin app navigation menu,
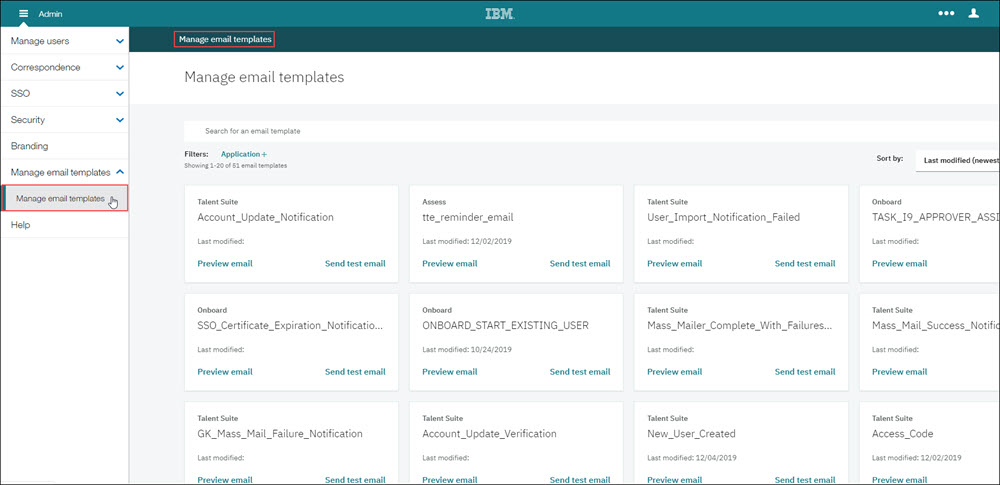
Expand Manage email templates and select Manage email templates to launch the configuration settings. The Manage email templates page opens in the default card view displaying your customized correspondence email templates.
Tip
Each page contains breadcrumb links which can be used to navigate through all Manage email templates pages.
Figure 46. Manage email templates default landing page
Continue to the Manage Email Templates Configuration section for configuration steps.
Manage Email Templates Configuration
Abstract
This section describes the various configurations of the Manage Email Templates self-service feature
The Manage email templates page opens to display up to 20 email templates in the default card view. On this page you can change the email template view, add additional templates to the email template view, search email templates, sort templates, filter by Application, access the email template to edit the template, preview email, and send a test email.
If you have more than 20 email templates,
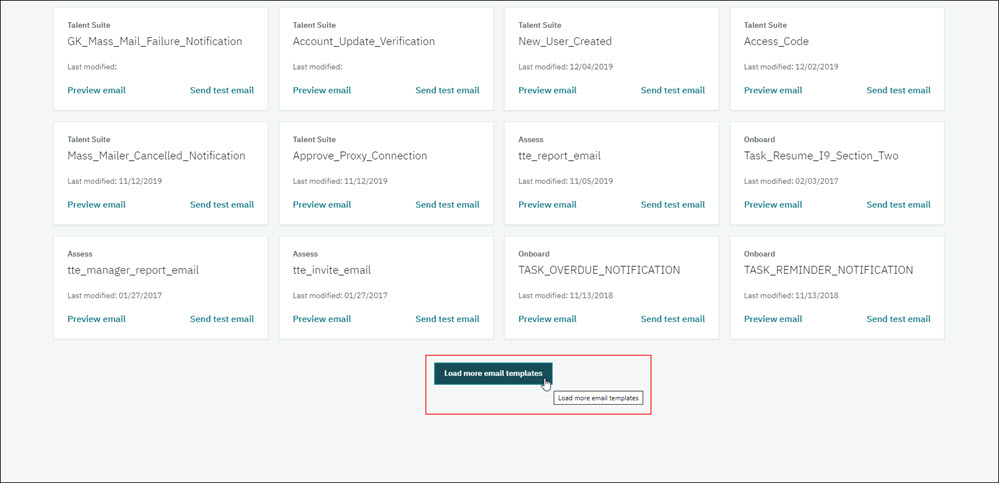
Select Load more email templates to display an additional 20 email templates.
Repeat this step to display all of your email templates.
Figure 47. Select Load more email templates to load additional email templates
To Change the Template View from a Card View to a List View
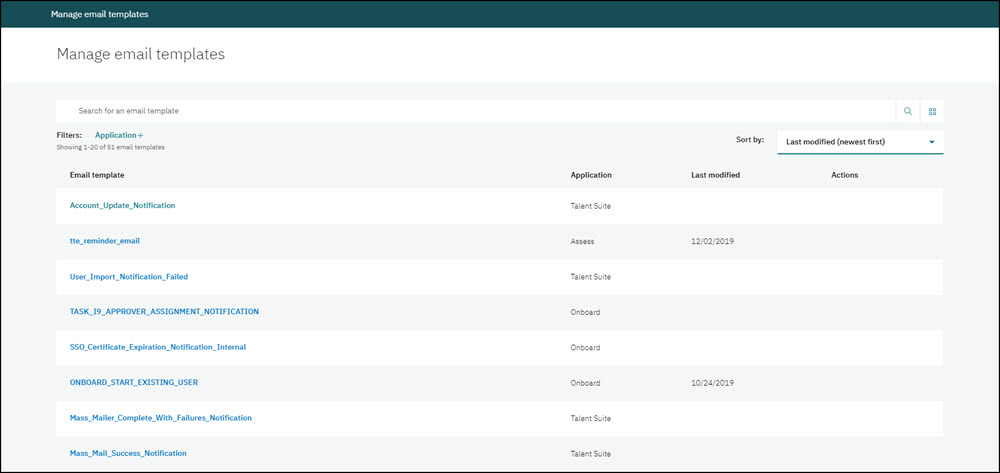
Select the Template view toggle icon. The Card view will now display as a list view.
To return to the Card view, select the Template view toggle icon again.
Note
The Template view toggle and the List view are only available on large screens (992px+). On smaller screens only the Card view is available.
Figure 48. Select Template view toggle to change email template view
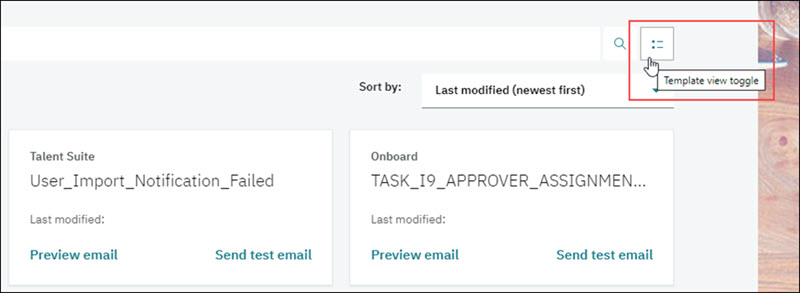 Figure 49. Email Template List View
To Filter by Application
Select Application+ (Filter by application) in the Filters field. The Filter by application dialing window opens.
Figure 50. Application+ - Filter by application
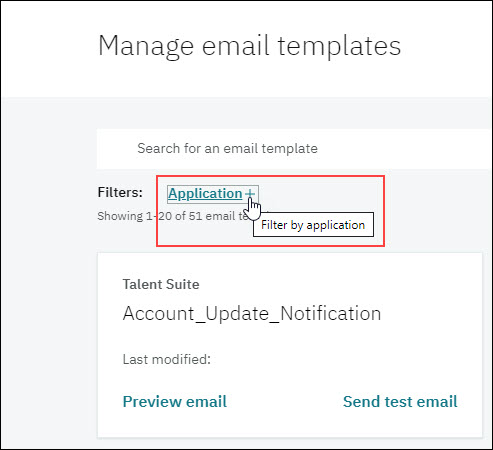 Figure 51. Filter by application dialog window
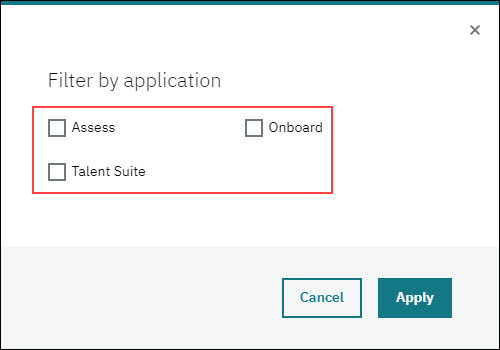
In the Filter by application dialog window, select one or more applications. The Manage email templates page then displays on those applications selected.
Figure 52. Filter by application results

Select the X in the application filter
 to remove and go back to the full email template list.
To add application to or remove applications from the application filter, select the application link name
 . This opens the Filter by application dialog window where you can update your selections.
To Search for an Email Template
Enter a search term in the Search for an email template field and select the Search icon. Email templates with that search term display.
Figure 53. Search for an email template field
 Figure 54. Search for an email template results

To return to the all email templates view, remove the search term from the Search for an email template field and select the Search icon.
To Sort Email Templates
Select the drop down arrow in the Sort by field to expand the selection list.
Figure 55. Sort by field
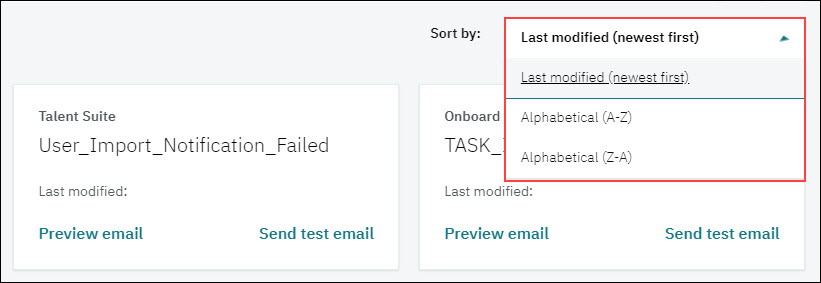
Select one of the following:
Last modified (newest first)
Alphabetical (A-Z)
Alphabetical (Z-A)
Preview Email
Abstract
Preview email is a read only display which allows the user to preview the email template and confirm it is the one to be edited.
Preview email gives the user the details of the email template. It includes all Markers that have been selected for the email template. The user can then determine if this is the email template they wish to edit. The different supported languages for the email template are displayed in the Language section. The user can view the Language drop down list to view the supported languages included with the email template.
To open the email template in Preview,
Select Preview email in the email template you wish to view and edit. This opens the email template in a read only Preview window.
Figure 56. Select Preview email to view in preview mode
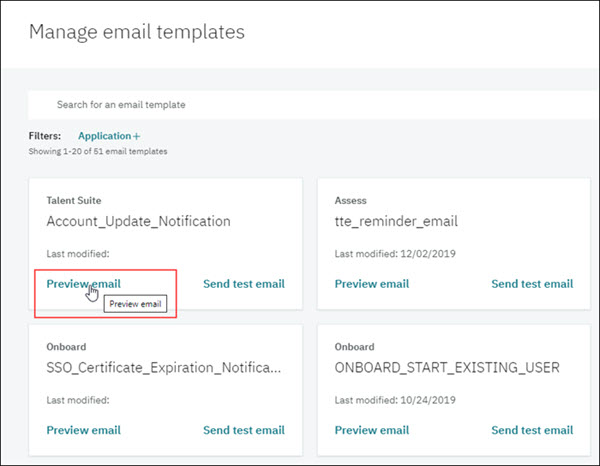 Figure 57. Preview window
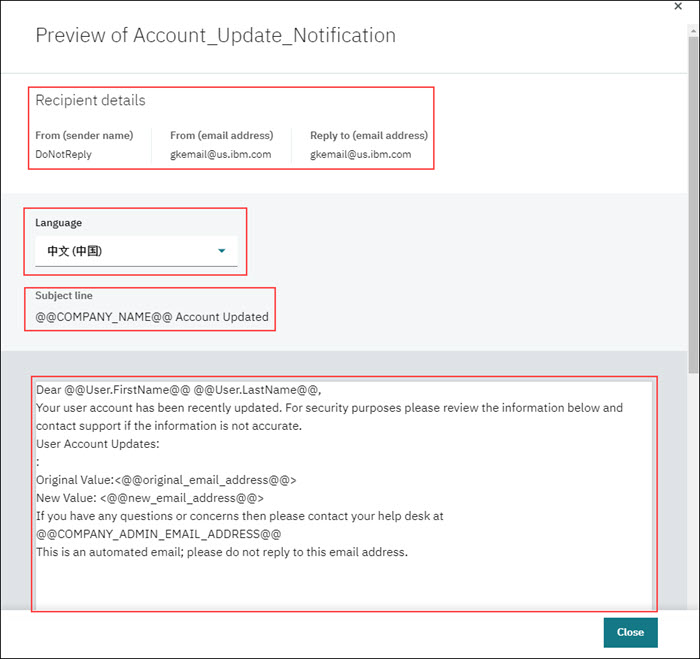
Review content for the following sections of the email template.
Recipient details which includes:
From (sender name)
From (email address)
Reply to (email address)
Language by selecting the drop down list in the Language section.
Subject line for Markers and content.
Body editor of the email template. This includes any images, links, Markers, and text for the email.
Review Markers for all sections of the email.
Select Close once your review has been completed.
If edits are required, proceed to the Edit Email section for instructions to edit and publish your email template.
Edit Email
Abstract
Edit email allows the user to make changes to their email templates as needed for various business needs. Fields in the email template are required or optional.
Markers
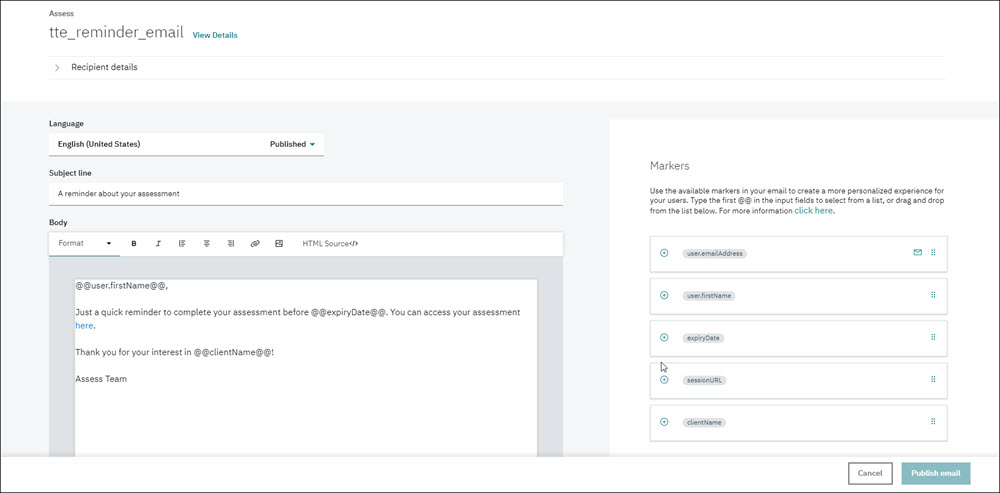
Markers are available to be used in your email to create a more personalized experience for your users. They are a placeholder that will be replaced with the specific user data for that Marker when the email is sent out. Markers may differ for each email template depending on the content of the email. Markers with the Mail icon signify it is an email address Marker. Marker details may be edited by the user. Specific email address or mailing list can be hard coded instead of adding a Marker. Markers can be dragged and dropped from the Markers list or added by selecting the plus + icon for the specified Marker in the Marker section to place the Marker at the cursor point of placement. Markers are displayed with the @ symbol (@@markerName@@) or greater than, percent symbol,equal/less than, percent symbol (<%=markerName%>). In the Markers section, you can select click here to bring up a list of description for each marker.
Important
Markers cannot be edited in this application. Templates are set up with the Markers that may be used. Markers differ per email template depending on what the template is to be used for.
Note
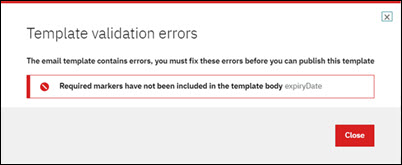
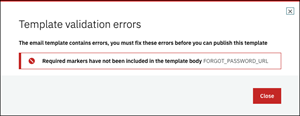
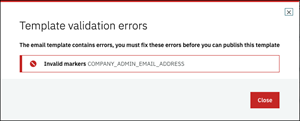
An error message displays when trying to save if there are problems with a Marker in a field.
Figure 58. Template validation errors message window - Marker error message
Marker Descriptions
In the Marker section, you can select click here to view a list of Markers and their associated description.
Figure 59. Marker Descriptions 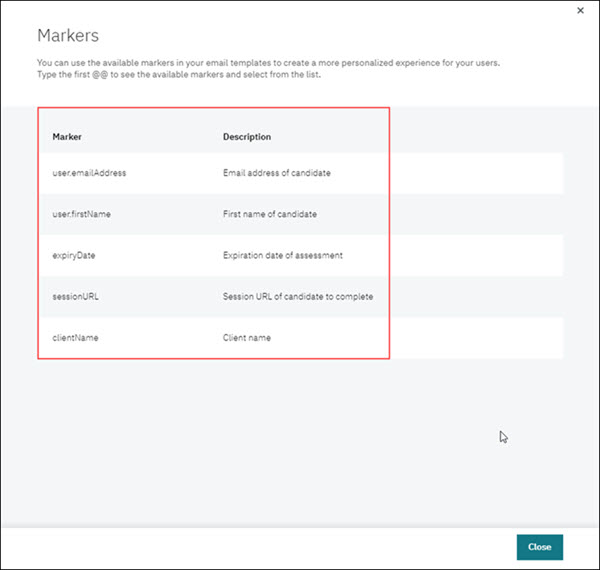
Language
The list of languages are based on languages enabled for that client in Talent Suite/Application. Each of these languages will have a Published status associated with it if the specific template is already published in that language, otherwise, the language will not have the published status.
Note
More information on the languages status can be seen by selecting the View Details link in front of the template ID.
Sender email address
The Sender email address is required, not optional. This is to prevent email spamming so the sender cannot pretend to be something they are not. Most of the time the Sender email address will be entered as a Marker so a different value comes through each time the email is sent.
Recipient Details
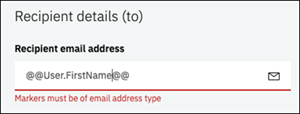
Recipient Details displays the Display Name value of the From field and any Markers added. The Recipient email address requires an email marker or valid email address.
Subject line
The Subject line accepts Markers such as someones name. This field is mandatory.
Body Editor
The Body editor has editing capabilities that allows the user to format text, import content, create links, insert images, and create or import HTML source code. The HTML Source is generated from the editor itself or allows the user to paste HTML in the Body editor field. The user can toggle from the HTML source code by selecting HTML Source to see what the HTML looks like. You can make changes directly in the HTML, however there is a preventative in place to sanitized the code and remove anything that should not be allowed.
Publishing
When publishing, a dialog window displays to confirm if you want to publish. If you select cancel in the publish confirmation dialog window, a dialog window asks if you are sure you want to cancel your changes without saving. This also occurs if you select the browser back button or if you change a language as well. The Change to <language name> dialog window asks if you want to save changes to language. Once published, a confirmation messages displays to confirm the publish.
Screen View
In a small screen view (such as an iPad) the user has to select the X icon to insert the Marker. The drag and drop function will not be available.
<listitem>
To edit,
</listitem><listitem>
To view details,
</listitem><listitem>
Edit the following sections as required.
</listitem><listitem>
In the Subject line field,
</listitem><listitem>
In the Body editor field,
</listitem><listitem>
Once your updates have been completed,
</listitem>
Select the email template name of the email template you wish to edit. This opens the email template in the Edit window.
Figure 60. Email Template Edit window
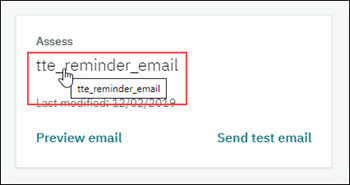 Figure 61. Edit window
Note
On smaller screens the marker list is not displayed. Markers are instead accessed through a Markers icon within the editor. Once selected, a slide-out Add markers window opens with the list of Markers with the + icon used to add them to the subject/body wherever the cursor is placed prior to selecting the Markers icon.
Select the View Details link next to the email template title. The View Details window opens to display the Date Created, Template ID, Last Modified date, and the list of languages published.
Note
View Details is high level and gives the date the email template was created, the languages that are supported, and the languages that have been published for the email. English (United States) is the default language. If the language displays Yes it has been published. If the language displays No it has not been published.
Figure 62. View Details link
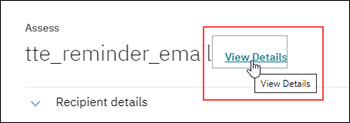 Figure 63. View Details window
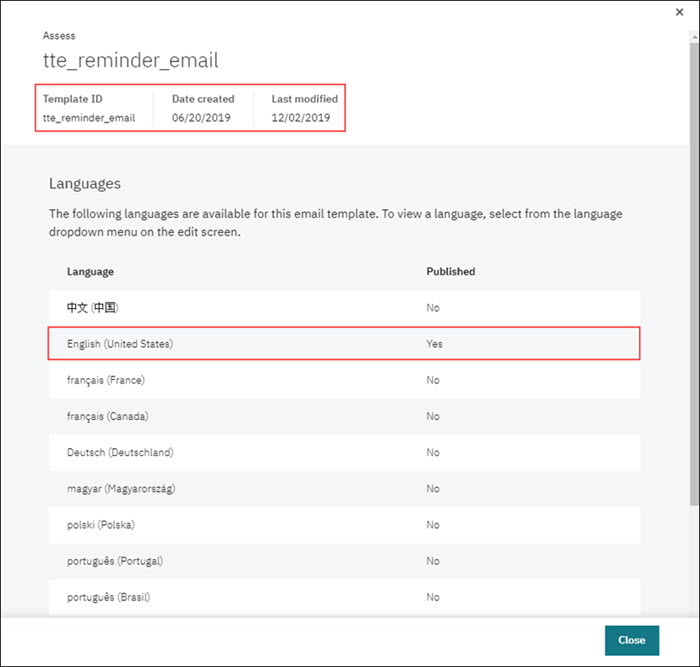
Select Close to close the View Details window.
Recipient details: To edit this section, select Edit. The Edit window opens with the available Recipient details Markers.
Important
The Recipient email address requires an email marker or valid email address.
Figure 64. Recipient details - select Edit
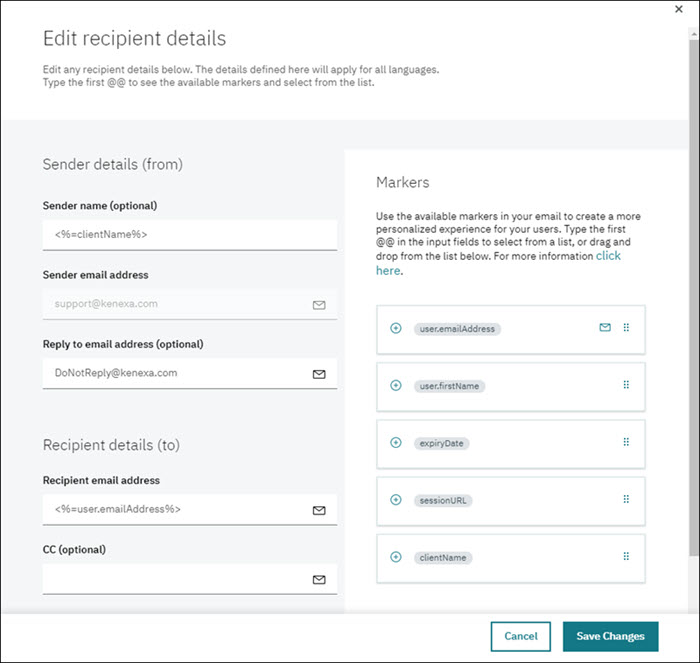
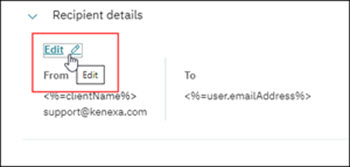 Figure 65. Edit window
Note
On smaller screens the marker list is not displayed. Markers are instead accessed through a Markers icon within the editor. Once selected, a slide-out Add markers window opens with the list of Markers with the + icon used to add them to the subject/body wherever the cursor is placed prior to selecting the Markers icon.
Figure 66. Marker icon

Figure 67. Slide-out Add markers window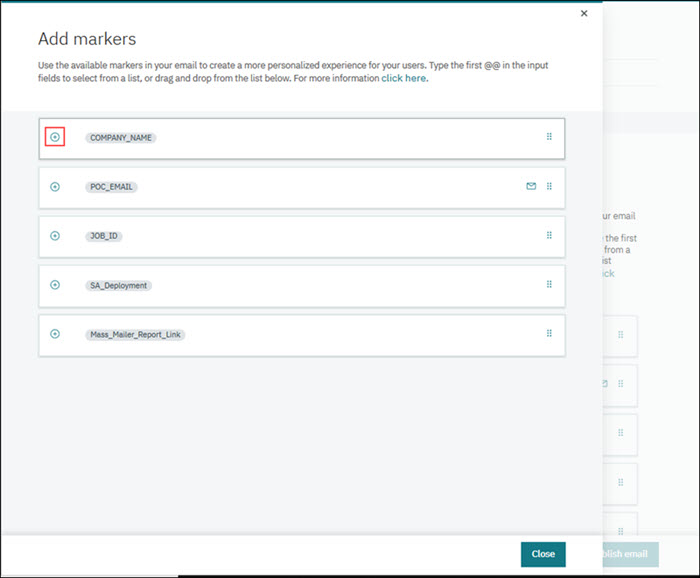
To update or add Markers, select a Marker from the Markers section and either select the X icon to insert the Marker at the cursor point or drag and drop the Marker to the desired field.
Note
To hard code an email address for a field, enter a valid email address for an individual or mailing list.
Important
A valid email address or Marker must be added to all required fields.
Select Save Changes to save your changes or Cancel to exit without saving.
Note
An error message displays when trying to save if there are problems with a Marker in a field.
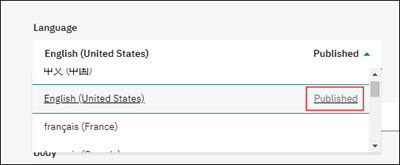
Language: To add additional languages for the email template, select the Language drop down menu and select a language.
Note
If a language has been published, Published displays next to the language in the Language drop down menu.
Figure 68. Language drop down menu
Enter a subject description and/or add the desired Marker from the Markers section.
Note
Markers can be dragged and dropped from the Markers list or added by selecting the plus + icon for the specified Marker in the Marker section to place the Marker at the cursor point of placement. Markers are displayed with the @ symbol or greater than, percent symbol/less than, percent symbol (<%markerName%>).
Enter the text content, images, and links for your email.
Figure 69. Body editor field Edit options

To format your text, select the one of the Format options (B, I, text alignment
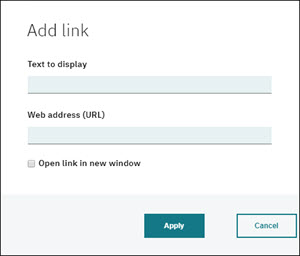
Select the link icon
 to insert a URL. The Add link dialog window open requesting Text to display and aWeb address (URL). Enter the applicable items, then select Apply to add your web link.
Figure 70. Add link dialog window
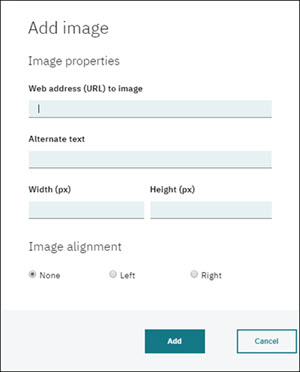
Select the image icon
 to insert an image. The Add image dialog window opens requesting a Web address (URL), Alternate text, Width, Height, and Image alignment. Enter the applicable items, then select Add to add your image.
Figure 71. Add image dialog window
Select HTML Source to either view the existing content in HTML mode or paste the desired HTML code for your email.
Tip
Edits can be made directly in the HTML source code view. You may view the HTML Source code or the HTML by selecting HTML Source to toggle the code view.
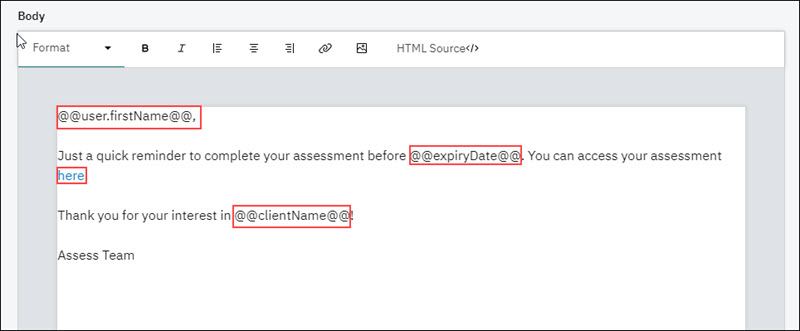
Add Markers as needed to the Body editor field.
Figure 72. Sample email with Markers and links
Select Publish email. A confirmation dialog window displays to confirm changes you have made and warns "Updates will be reflected in the product immediately.".
Figure 73. Publish dialog window
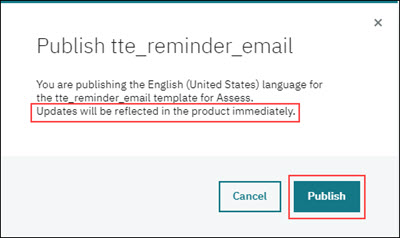
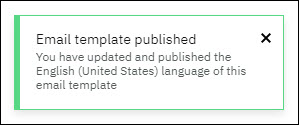
Select Publish in the dialog window. A confirmation message displays stating the email template has been published.
Figure 74. Publish confirmation message
Note
Email templates may be edited again after publication.
Send Test Email
Abstract
The Test Email function allows the user to view how the email would appear to the recipient in read-only format.
The details are displayed along with the substitutes for the various markers.
On the Manage email templates page,
Select Send test email in the applicable email template card. The Send test email page opens for that email template.
Figure 75. Select Send test email
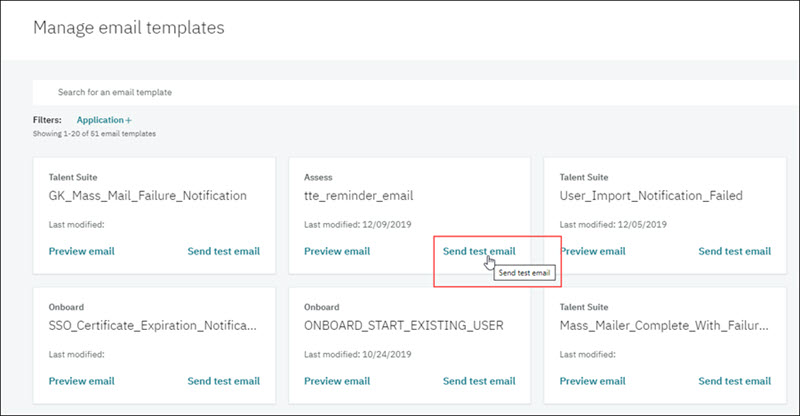 Figure 76. Sent test email page
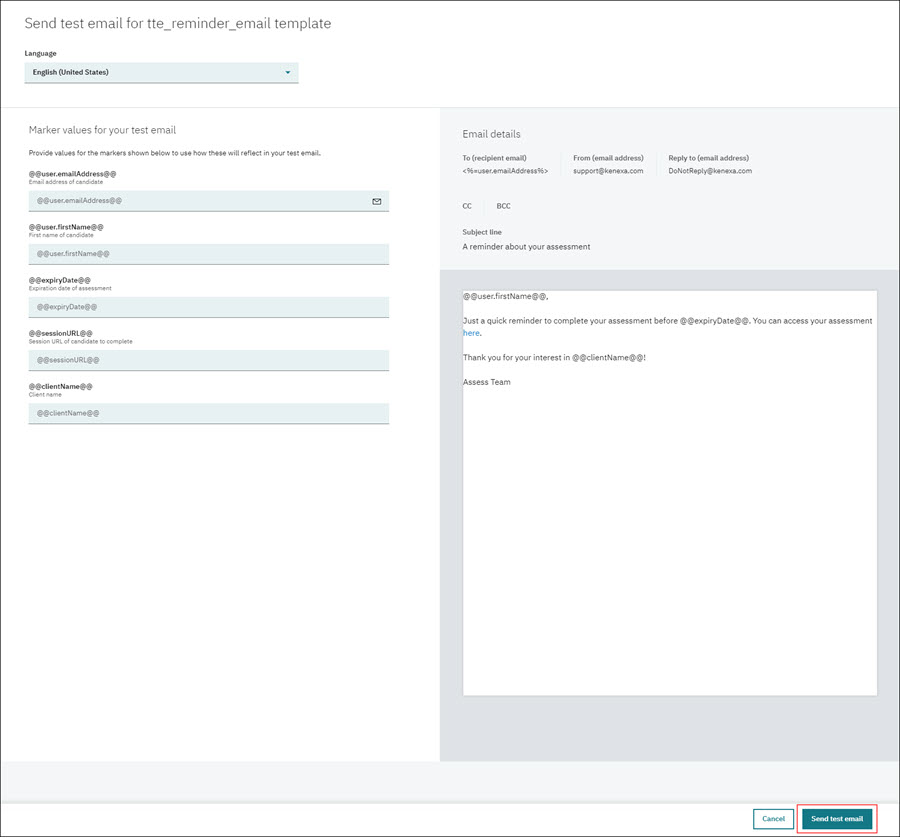
In the Marker values few your test email section,
Change content in the various marker fields that require an update (if applicable).
Note
The Marker fields that have been changed will update in real-time and displayed in the test email preview pane.
After any changes are made,
Select the Send test email button. A success message displays.
Note
The user is sent back to the default Manage email templates page. They will then receive the test email in their email application.
Available Email Templates
Abstract
There are specific email templates available for each application. This section describes each email template by application.
Table 22. Talent Suite Available Email Templates
Email Template Name | Email Template Description |
|---|---|
Access_Code | This template provides the access code to the user when Two-Step Authentication feature is enabled. |
Account_Update_Notification | This template notifies the owner of the original email address that the email address for their user has been requested to change when Email Verification feature is enabled. |
Account_Update_Verification | This template is to request the owner of the new email address verify their access to that email address before updating the user to the new email address when Email Verification feature is enabled. |
Approve_Proxy_Connection | This template notifies a user that they are responsible for approving or rejecting an Infinite support user's proxy access when Proxy feature is enabled.
|
Forgot_Password | This template is for a user to reset their forgotten password when Security Challenge Questions feature is disabled. |
Forgot_Password_with_Challenge_Questions | This template is for a user to reset their forgotten password when Security Challenge Questions feature is enabled. |
GK_Mass_Mail_Failure_Notification | This template notifies someone when a mass mail job has a system failure and can not complete. |
Mass_Mail_Success_Notification | This template notifies someone that the mass mail job has completed successfully with no failures. |
Mass_Mailer_Cancelled_Notification | This template notifies someone that the mass mail job that was running was canceled. |
Mass_Mailer_Complete_With_Failures_Notification | This template notifies someone that the mass mail job complete but that there was failures. It includes a link for them to download the report and identify the issues. |
New_User_Created | This template notifies a user they have been granted access to the Talent Suite and for them to set their password. |
Rehire_User | This template notifies a user that has been rehired how to access their account. |
Reset_Password | This template is used to reset their password. |
Reset_User | This template is used to reset a user. |
User_Export_Canceled | This template notifies someone when a User Export has been canceled. |
User_Export_Notification | This template notifies someone when a User Export has completed and provide a link to the file for download. |
User_Import_Canceled | This template notifies someone when a user import has been canceled. |
User_Import_Notification | This template notifies someone when a user import completes with no failures. |
User_Import_Notification_Failed | This template notifies someone when a user import has a system failure and cannot completed. |
User_Import_Notification_Failure_Report | This template notifies someone when a user import completes with failures. This email contains a link for them to access the Failure Report so they can make changes and fix the issues. |
Table 23. Onboard Available Email Templates
Email Template Name | Email Template Description |
|---|---|
Bulk_Communication |
|
Bulk_Communication_No_CC |
|
DHS_Reverify_Alien_Permanent_Resident | To be sent to New HIre if I-9 Section is reopened from the E-Verify Activity, for the DHS REVERIFY ALIEN/PERMANENT RESIDENT status |
DHS_Reverify_Citizen | To be sent to New Hire if I-9 Section is reopened from the E-Verify Activity, for the DHS REVERIFY CITIZEN status |
DHS_Reverify_DMV | To be sent to New Hire if I-9 Section is reopened from the E-Verify Activity, for the DHS REVERIFY DMV status |
I9_RECEIPT_USED_NEW_HIRE_NOTIFICATION | To be sent to New Hire If I-9 Section 2 is completed with a Receipt (for any document). |
ONBOARD_START_EXISTING_USER | To be sent to New hire when completing Onboard Start for an applicant with a Talent Suite SSO (previously successful completion of Onboard Start) |
Preinitiate_Everify | To be sent to the New Hire if I-9 Section 1 is reopened from the E-Verify Activity, before the case has been initiated. |
Primary_HM_Default_Form_Completed | To be sent to the Primary Hiring manager when Forms are conditioned on an activity in a workflow; and no condition is met to display a PDF. |
SSA_Resubmittal | To be sent to New hire If I-9 Section is reopened from the E-Verify Activity, at the SSA RESUBMITTAL status |
SSA_Reverify | To be sent to New hire If I-9 Section is reopened from the E-Verify Activity, at the SSA REVERIFY status |
System_Admin_Multiple_Form_Conditions_Met | To be sent to administrator when Forms are conditioned on an activity in a workflow, if more than one condition is met to display a PDF |
System_Admin_No_Form_Condition_Met | To be sent to administrator when Forms are conditioned on an activity in a workflow, if no condition is met to display a PDF. |
Task_Claim_Notification | Email is sent to all previous task owners.; when a user with the capability to claim a task selects the Claim Task action from a new hire context menu. |
TASK_I9_APPROVER_ASSIGNMENT_NOTIFICATION | If I-9 Section 1 is completed with a Internal approver identified, the email will be sent to the approver notifying them of action required for completion of I-9 Section 2. |
TASK_I9_THIRD_PARTY_APPROVER_NOTIFICATION | If I-9 Section 1 is completed with a Third Party identified, the email will be sent to the Third Party notifying them of action required for completion of I-9 Section 2. |
TASK_I9_THIRD_PARTY_NEW_HIRE_NOTIFICATION | If I-9 Section 1 is completed with a Third Party identified, the email will be sent to the New Hire notifying them of action required for completion of I-9 Section 2. |
TASK_OVERDUE_NOTIFICATION | Based on the configuration, this email will be sent to the user 'N' days AFTER the task due date. |
TASK_REMINDER_NOTIFICATION | Based on the configuration, this reminder email will be sent to the user 'N' days BEFORE the task due date. |
Task_Reminder_Email |
|
Task_Reopen_Default_Notification | This email is ONLY sent to the owner of the task, if they are not the user taking the reopen action. |
Task_Reopen_I9_Section_One | When the I-9 Section 1 is reopened from I-9 Section 2 this email is sent to the new hire responsible for Section 1. |
Task_Resume_I9_Section_Two | When an I-9 Section 1 is reopened from I-9 Section 2, this notification is sent after the successful completion of I-9 Section 1. |
Task_Resume_Default_Notification | Email will be sent when a task is resumed from a suspended state (currently only for I-9 Section 2 and Everify in specific use cases). |
W4_Allowances_Notification | When the W-4 form is filled out and signed and submitted to the Talent Suite an email is automatically generated if the employee has over 9 allowances. |
W4_SSN_Last_Name_Different_Employee | When the W-4 form is filled out and signed and submitted to the Talent Suite two emails are automatically generated if the employee claims that his/her name is different than what appears on his/her social security card. This is sent to the EMPLOYEE. |
W4_SSN_Last_Name_Different_Employer | When the W-4 form is filled out and signed and submitted to the Talent Suite two emails are automatically generated if the employee claims that his/her name is different than what appears on his/her social security card. This is the EMPLOYER email. |
Update_I9_Everify | If I-9 Section is reopened from the E-Verify Activity, at the Duplicate Case status, the following email is sent. |
Table 24. Assess Available Email Templates
Email Template Name | Email Template Description |
|---|---|
tte_invite_email/3pm_tte_invite_email | This template is used to provide candidates, with the Email Distribution method, their assessment information. |
tte_manager_report_email/3pm_tte_manager_report_email | is used to provide Managers/Assess Admins the scoring details of assessments completed by candidates. |
tte_report_email/3pm_tte_report_email | This template is used to provide candidates the scoring details of the assessments they completed. |
tte_reminder_email | This template is used to remind candidates about the assessments they need to complete before they expire. |
utg_weekly_alert_notification_email | This template is to send the UTG usage information detail of Sales reps. |
tte_report_no_links_email/3pm_tte_report_no_links_email | This template is used when there is no candidate facing report available for the assessment. This template informs the candidate that their assessment has been completed. |
utg_monthly_overage_email | Project Office will receive monthly report which contains the list clients reached overage. |
utg_weekly_warning_email | Infinite Renewal reps and BPs will receive weekly report which contains the list of clients in warning and reached the overage. |
Error Handling
Abstract
There is error handling built in that displays error messages to ensure fields, markers, content, etc. are correctly in place before publishing an email template.
Following is a list of error messages and their description.
Table 25. Error Handling
Error Messages | Description |
|---|---|
Required markers have not been included in the template body.
| Certain markers have been designated as required by the application team and must be used in that email template.
|
Invalid email address format.
| All email address fields must contain a valid email address. |
Invalid markers.
| If a user uses the marker format but reference an invalid marker they will see this error. |
Markers must be of email address type.
| Fields that have been designated as email fields can only be populated by email type markers or valid email addresses. |
Value exceeds maximum length of 256 characters.
| Fields have a maximum length of 256 characters. |
Email marker value cannot end with a comma or semi-colon.
| Email markers can normally be entered as a list but cannot end with a list separator. |
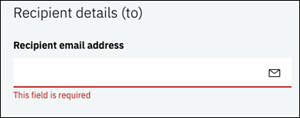
This field is required.
| Shown when a required field (one that does not have optional beside it) has been left empty. |
This field must contain a single valid email address or marker.
| The reply to field can only have one valid email marker or email address. |
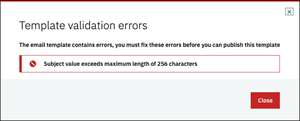
Subject value exceeds maximum length of 256 characters.
| The subject cannot be longer than 256 characters. |
Take the necessary steps to correct the error shown in the error message(s).

