Abstract
Product: BrassRing on Cloud
The eLink Dashboard
The eLink dashboard contains any candidate, req, and form information sent to a user by using eLinks.
A user's eLink Dashboard is unique to that individual user. It houses items that were eLinked directly to that user for action. The dashboard is created for the first time after a user is sent an eLink from BrassRing. Because the eLink Dashboard is unique, to the individual, they can bookmark the link in their browser to access it at a later time.
The eLink dashboard shows eLinks sent to the user in the last 180 days by default. Clients can configure the number of days between a range of 10 days to 180 days. (Options: 10, 20, 30, 60, 90, 120, and 180 days).
The eLink dashboard includes:
Candidates for review.
Forms to complete, approve, or view.
Reqs to approve, add, edit, or view.
The eLink dashboard respects any user type permissions associated to the user/non-user when viewing data.
The eLink dashboard is not applicable to candidate facing communications or eLinks. Candidates do not see any change in how they access their eLinks.
The cards on the eLink dashboard can be reordered by the individual user. Users can drag and drop cards to arrange as they need. There is no configuration option at this time to default card order or to remove cards from the dashboard.
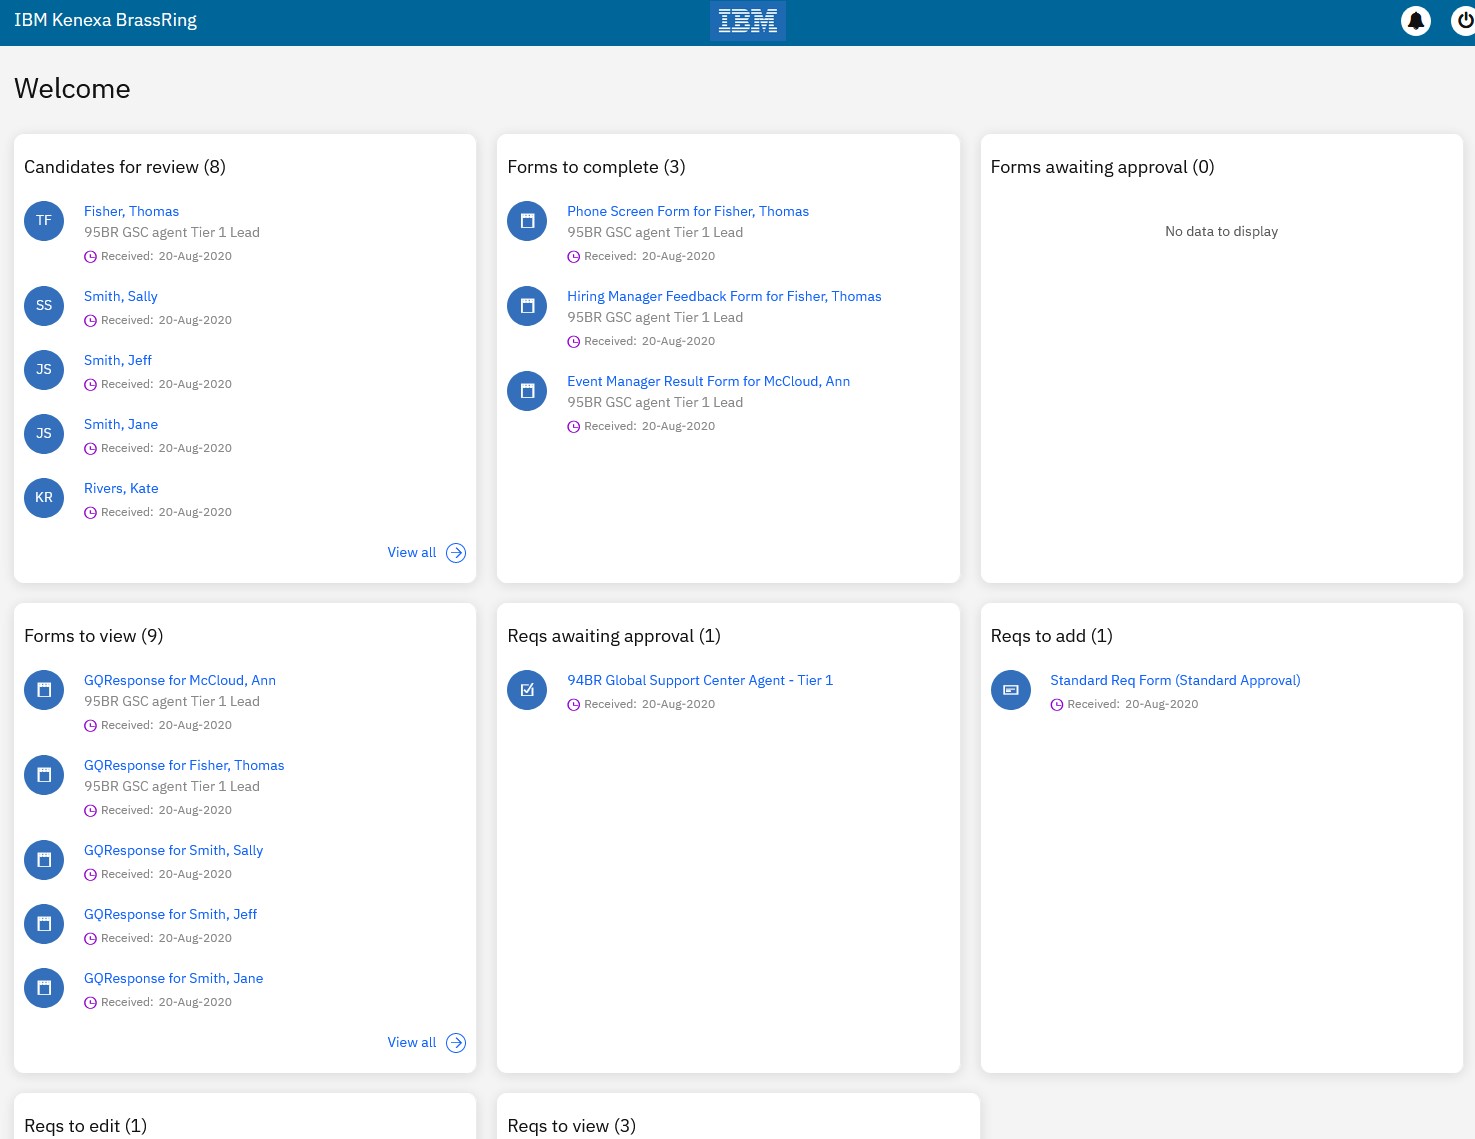
eLinked items the date that the item was received and viewed.

The eLink dashboard only displays data for:
Active reqs, or reqs that are Pending, Approved, or Open.
Active candidates, or candidates that are not in a Disposition status.
The eLink dashboard is deactivated if the user is removed/inactivated from the system. Brassring Administrators also have the ability to remove access to active users.
When candidates are eLinked from within a requisition that is marked as confidential/Secure, if the recipient of the eLink does not have access to view that req (they are not on the req team or they do not have the user type privilege to see all secure reqs), then they see a NOACCESS message under the Resume/CV section when viewing the candidate.
The eLink Dashboard includes authentication.
Pass code-based authentication is enabled based on client setting configuration. (Explained in the Configure eLink Dashboard section of the Documentation). Each eLink recipient must enter an authentication code that is sent to their email address.
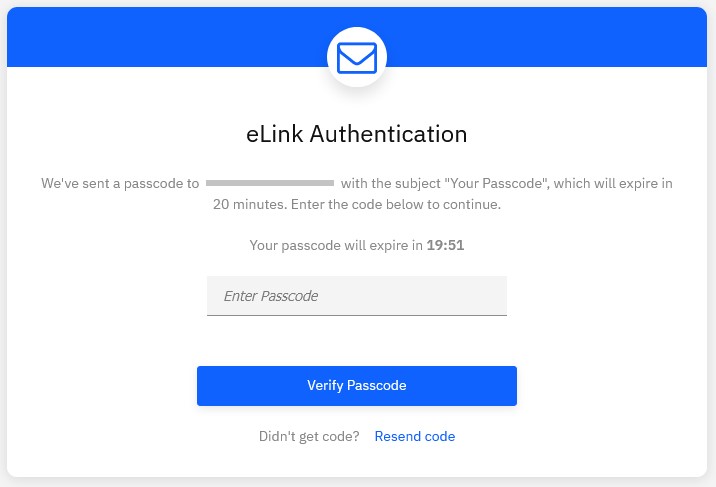
If your organization uses existing eLink authentication functionally, by using a password or Single Sign On (SSO), users can continue to use this authentication mechanism instead of pass code authentication.
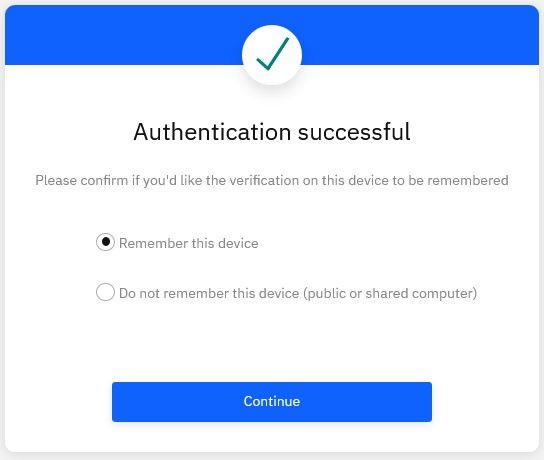
After authenticating, the user can select Remember this device for trusted computers, or Do not remember this device in the case of shared or public computers.
eLink Expiration
Processes
Access the eLink Dashboard
To access the eLink Dashboard:
Select the My eLink Dashboard link in an email with an eLink.

Access the eLink Dashboard by using a URL bookmark.
After selecting the link or URL, enter the authentication details. To log out of the eLink Dashboard, select the Logout icon → Sign out of all Devices.
View Alerts
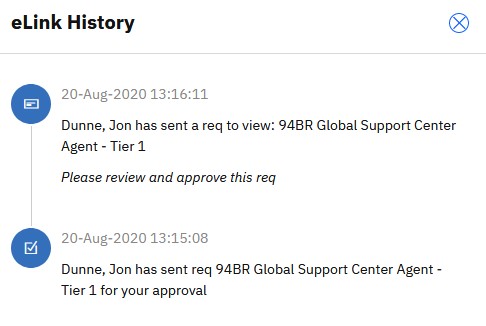
To view alerts and messages, select the Alerts Bell Icon.
The eLink History pane opens. Review the eLink History and select the X icon to close the pane.
Review Candidates
For more information on eLinking Candidates, see eLinking Candidates.
Select View All in the Candidates for review card to see the list of candidates for review.
The [Folders] page opens with the candidates are organized by req.
Select the req, or No req associated to view the list of candidates.
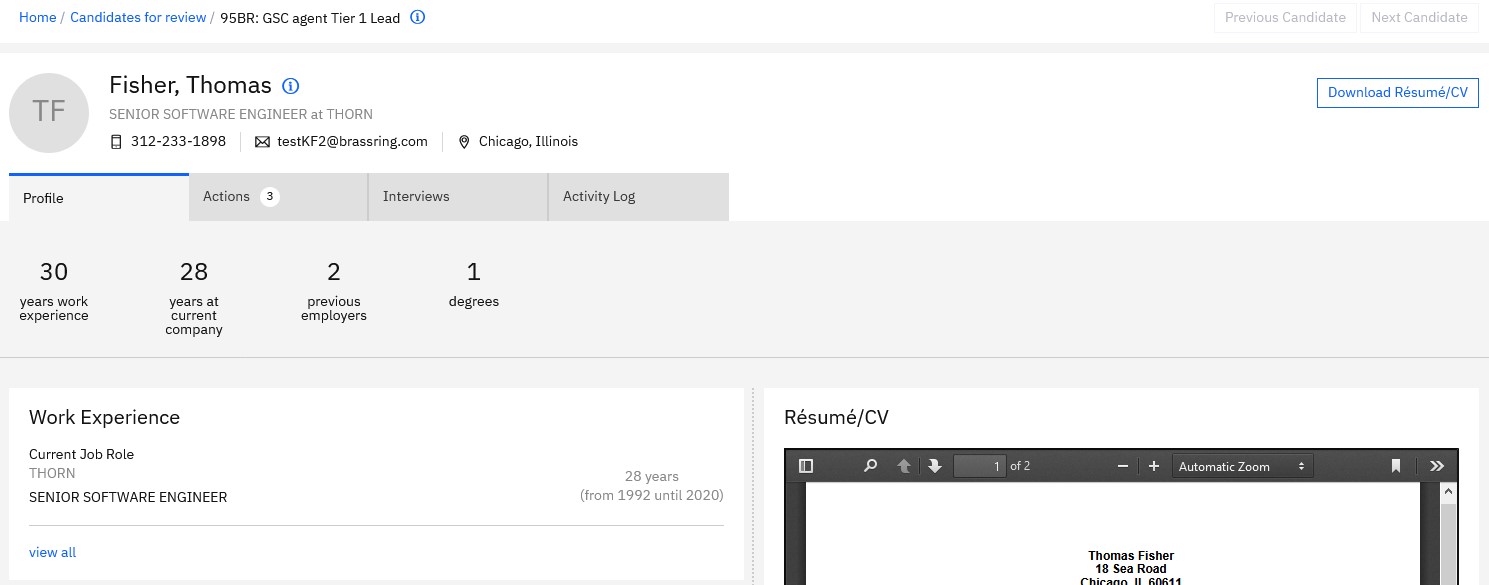
To review a candidate, select View Profile on the [Folders] page, or select the candidate name in the [Candidates for review] card on the [home page].
The candidate details open.
The req that the candidate is associated with is described in the breadcrumbs.
Select Next Candidate or Previous Candidate to navigate between multiple candidates.
The tabs that display depend on the selections that are made by the sender of the eLink.
To Download the candidates’ resume or CV for review, select Download Resume/CV.
Select the Profile Tab to view:
A snapshot of the candidates’ details.
The candidates’ Work Experience, and Education details. Select view all to review the Work Experience or Education details as needed.
Any Forms or attachments to view. Select the Form name to view the form. Select the candidates’ name to return to the candidates’ details in the req.
Select See text version or See PDF version to review the candidate’s resume or CV in the text of PDF view.
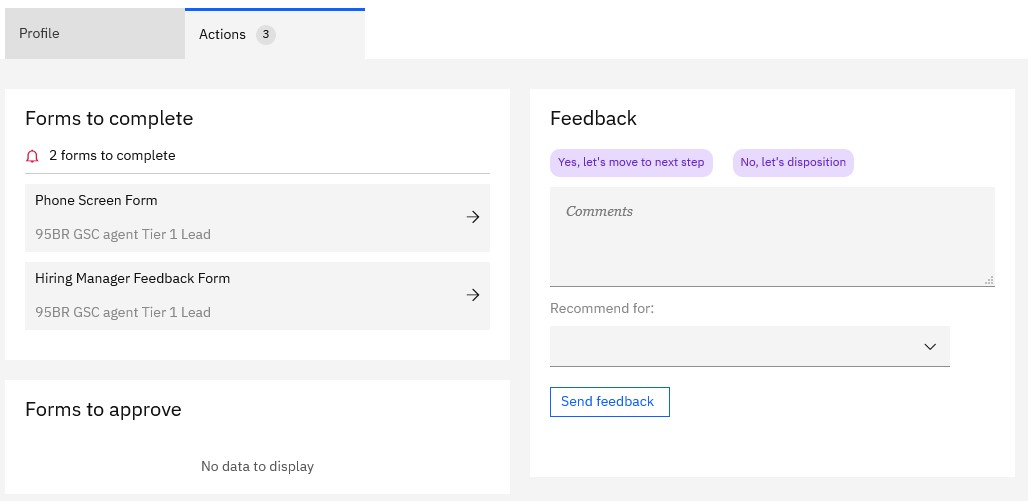
Select the Actions tab to view any actionable items, including Forms to complete, Forms to approve, and the section to provide feedback. The [Actions] tab displays the number of actions that are required for that candidate.
To complete a form, select the form name in the [Forms to complete] section. Complete the form as needed and select Submit. Select the candidates’ name to return to the candidates’ details in the req.
To approve a form, select the form name in the [Forms to approve ]section. Review the form, and select Approve or Decline as needed. Select the candidates’ name to return to the candidates’ details in the req.
To submit feedback, enter the feedback in the [Comments] text box, or select a preselected response. If needed, select an HR status to recommend the candidate for, and select Send feedback.
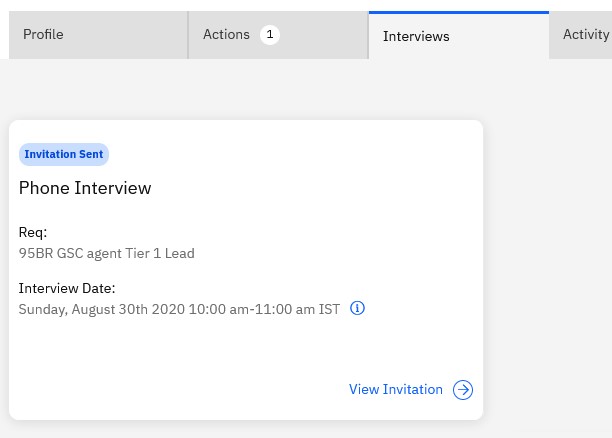
Select the Interviews tab to view any interviews that the candidate is associated to. The interview card includes the Interview status details.
Select the Activity Log to view the latest history of the candidate. Select View all activity to view the full activity history.
Complete Forms
To complete a form, select View All in the [Forms to complete] card and select the Form Name. Alternatively, select the Form Name in the [Forms to complete] card on the [home page].
Insert the form details as needed.
Select Save as Draft to save the form to complete later, select Clear to clear any entered responses, or select Submit to complete the form.
Approve or Decline Forms
To approve a form, select View All in the [Forms awaiting approval] card and select the Form Name. Alternatively, select the Form Name in the [Forms awaiting approval] card on the [home page].
Review the form, and select Approve or Decline as needed.
View Forms
To view a form, select View All in the [Forms to view] card and select the Form Name. Alternatively, select the Form Name in the [Forms to view] card on the [home page].
Review the form as needed. If needed, select View image PDF to view the form as a PDF.
Approve or Decline Reqs
To approve or decline a req, select View All in the [Reqs awaiting approval] card and select the Req Name. Alternatively, select the Req Name in the [Reqs awaiting approval] card on the [home page].
Insert a message as needed, and complete any other details for the Approval.
Select Approve or Decline as needed. Depending on your organizations configuration, the Decline option might not be available.
Add a Req
To add a req, a blank req form must be sent to the user to complete. For more information, see eLinking Reqs.
To add a req, select View All in the [Reqs to add] card and select the Req Name. Alternatively, select the Req Name in the [Reqs to add] card on the [home page].
Insert the details of the req as needed. For more information on adding a req see, Add or Edit a Req.
Select Save as Draft to save the form to complete later, or select Submit to add the req.
Edit a Req
Reqs are available to edit after they have been added.
To edit a req, select View All in the [Reqs to edit] card and select the Req Name. Alternatively, select the Req Name in the [Reqs to edit] card on the [home page].
Update the details of the req as needed. For more information on editing a req see, Add or Edit a Req.
Select Save.
View a Req
To view a req, select View All in the [Reqs to view] card and select the Req Name. Alternatively, select the Req Name in the [Reqs to view] card on the [home page].
Review the req as needed, by using the Details, History, Attachments, and Notes links.
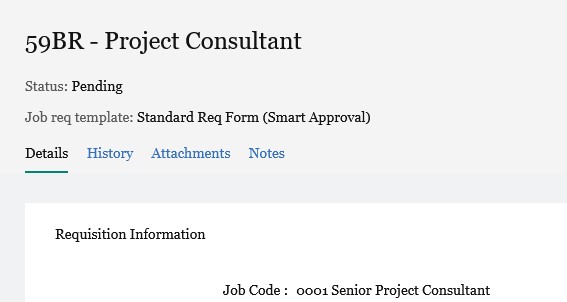
If the req is required to be approved, select Approve Req.