Abstract
Product: BrassRing
View Candidates in a Req
After qualified candidates are identified for the position, they can be moved through the hiring process. Typically, this is performed within the req folder.
Column headings in a grid and display candidates are output fields. Your organization opted for certain output fields to appear as defaults in BrassRing.
Output fields are based on the information that is fielded from resumes or CVs, providing you with a candidate’s most recent information, such as specific contact, employment, or education information.
The [Codes field] displays the most recent code information for candidates, and is assigned each time that a candidate applies through a Talent Gateway. Based on your user type, select the hyperlinked string of codes to access a candidate’s code history.
When viewing a candidate in a req, the candidate's Resume or CV submitted when they applied, is the Resume or CV shown when viewing the Talent Record. Even if that Resume or CV is not the most recently submitted Resume or CV.
After the candidate has applied to a job, they cannot change the Resume or CV they submitted for that job.
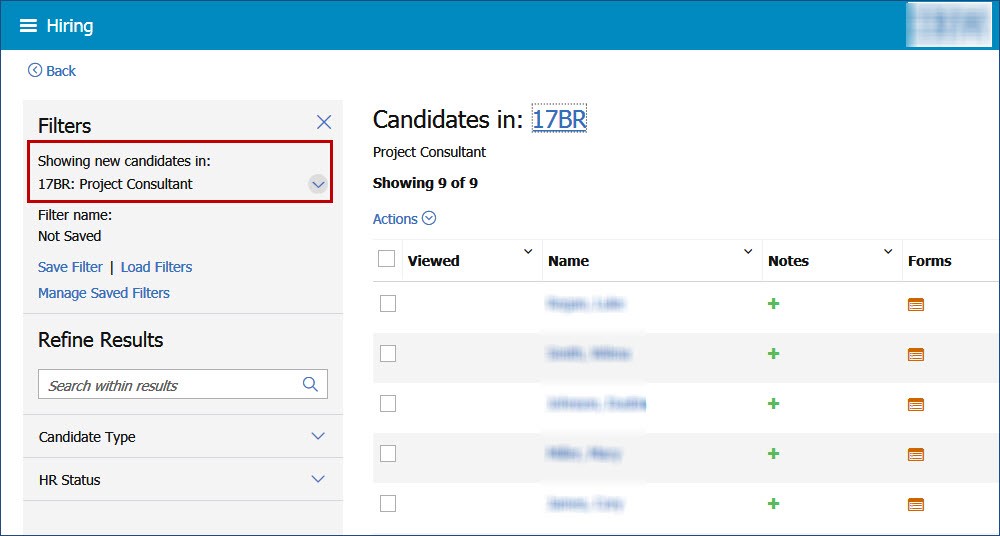
Req related information is provided in the [Filter] section of the candidate listing screens. Build 19.05.06. The information displays the current [req number: job title] along with the candidate results context.
If the number displayed in the New column in a req listing is selected, the label Showing new candidates in:<req no>:<job title> is displayed.
If the number displayed in the Total Active column in a req listing is selected, the label Showing active candidates in:<reqno>:<job title> is displayed.
If the Total or any HR status or Candidate type links in a req listing are selected, the label Showing candidates in:<reqno>:<job title> is displayed.
A pull-down icon is displayed next to the Showing candidates label which opens an auto-complete text box. The place holder text of the auto-complete text field depends on the type of listing from which the user navigates to the current screen. For example, if the user navigates from My open reqs, then the auto-complete field displays My open Reqs and users can search only for those reqs.
Searching and selecting a req from this pull-down menu refreshes the page and displays candidate listing from that searched req.
Any filter selection for the previous req is carried over to the next req that is opened.
Candidate results are dependent upon the type of candidates selected in the initial candidate listing. If New candidates are selected, only new candidates are displayed in the next req.
The filter criteria is not retained after the user navigates away from this req folder.

Relevant eLearning
Process

View Candidates in a Req
To view candidates in a req, in the My Open Reqs tab on the home page, or select Menu → Reqs → View my reqs or View all reqs → Open, and select the Req number.
Select the New or Total number.
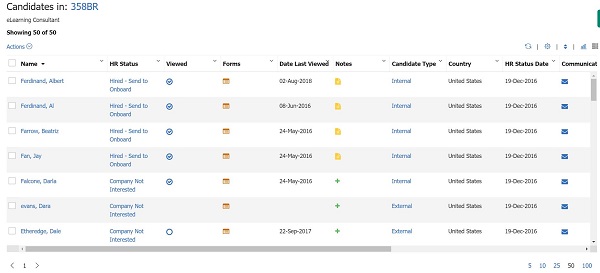
Depending on the selection made, the number of new Candidates, candidates that have not been viewed, or the total number of candidates in that req displays.
Manage the Candidates display
Columns can be arranged by selecting the column heading.
To change the order of display of the columns, select a column heading and drag it to where its needed in the order.
Select the arrow in a column heading and select Pin Left or Pin right to pin that column to the far left or right of the grid. To unpin a pinned column, select the column heading arrow → Unpin.
To view more or less candidates on the page, select the number of candidates to display.
To move between pages of results, select the page number, or use the arrow icons to move to the next, or previous, page.
Select Refresh to update the list of candidates.
Select Table display to update the columns that display.
To add a column, select a column from the Available Columns list and select the arrow pointing to Selected Columns. Select Submit.
To remove a column, select a column from the Selected Columns list and select the arrow pointing to Available Columns. Select Submit.
To change the order of display of the columns, select a column in Selected Columns, and drag it to where its needed in the order. Select Submit.
Select Advanced Sorting to sort the candidates displayed. Advanced Sorting uses up to three different criteria for sorting the display. Enter the sorting options, and select Apply Sort.
Select Visualize to view a visualization of the candidates. Select the View menu to change the visualization.
Select Grid View to view the list of candidates in the grid structure.
Export the list of Candidates
The Export Excel action, exports the list of candidates on the screen to a Microsoft Excel Spreadsheet.
The export only includes the current grid display, up to a maximum of 50 candidates. If you are viewing 100 candidates on the page, the first 50 candidates are exported.
If you have multiple pages of candidates, each page must be exported individually.
Candidate selections must be on one page only to be exported. If the candidates are on multiple pages, it is recommended to arrange or sort the candidates to have them on one page for the export. The Excel spreadsheet downloads.
To export up to 50 candidates to an Excel Spreadsheet, select Actions → Export Excel. The Excel spreadsheet downloads.
To export a custom list of candidates, select the candidates to be exported, and select Actions → Export Excel.