Abstract
Product: BrassRing
Outlook 365 is part of Microsoft Office 365 Suite, a cloud-based subscription service that allows organizations to create, communicate, and collaborate by using Microsoft tools. Infinite takes no responsibility for the content in third-party programs, and the process on this page might not accurately represent the Microsoft 365 system. Infinite is not responsible for the content on third-party websites.
Connecting to your Calendar
The Manage Schedules page in Interview Manager is used to select the interviewers for an interview and look up their real-time availability based on their Outlook calendar. The free or busy schedules can be viewed for any BrassRing user and those that have shared their calendars with the BrassRing user. Connect your calendar allows the BrassRing user to log in to their Office 365 account and give consent to the BrassRing application to access the organization calendar.

Calendar Integration Configuration Types
Clients must register their own app in Microsoft Azure Portal and then enter the Tenant ID, Application Key Application Secret in Workbench. There are three integration types:
Basic. BrassRing provides an inbuilt Office 365 app to validate the integration. It is only intended for testing and validating the integration by connecting to the organization’s Office 365 calendar, giving consent to the BrassRing app, and getting the free or busy schedule of the users in their organization.
Advanced. Advanced configuration should be used for the production environment, but can be used for the staging environment, provided the respected staging URIs are added in the AZURE configuration along with production URIs. For more information, see Step 10 in the Microsoft Azure configuration section. After that only one set of keys can be used for both the staging and production environment. There is no need to create two separate applications inside the Azure portal. With the Advanced configuration, there are two consent options available:
User Consent. The users must sign in to their Office 365 account by using the Connect your calendar option and provide consent. For more information, see Calendar Integration.
Admin Consent. The user is signed in to their Office 365 account by using their BrassRing user email ID and they can obtain the free or busy schedules of any user with the domain.
None. This is the default option and means that there is no integration.
Troubleshooting Basic Configurations
If a calendar cannot be connected after selecting the Basic configuration, your organization's Azure Admin might not have enabled the required privileges for Basic setup to access the data. Work with the Azure Admin to enable the setting inside Azure Admin Portal. Alternatively, use an Advanced Configuration to create keys that can be used for both the staging and production environments.
Sign in to the Azure portal as a Global Administrator.
Select Azure Active Directory → Enterprise applications → User settings.
Enable user consent in the [Users can consent to apps accessing company data on their behalf] field.
Configuration Process
Microsoft Azure Configuration
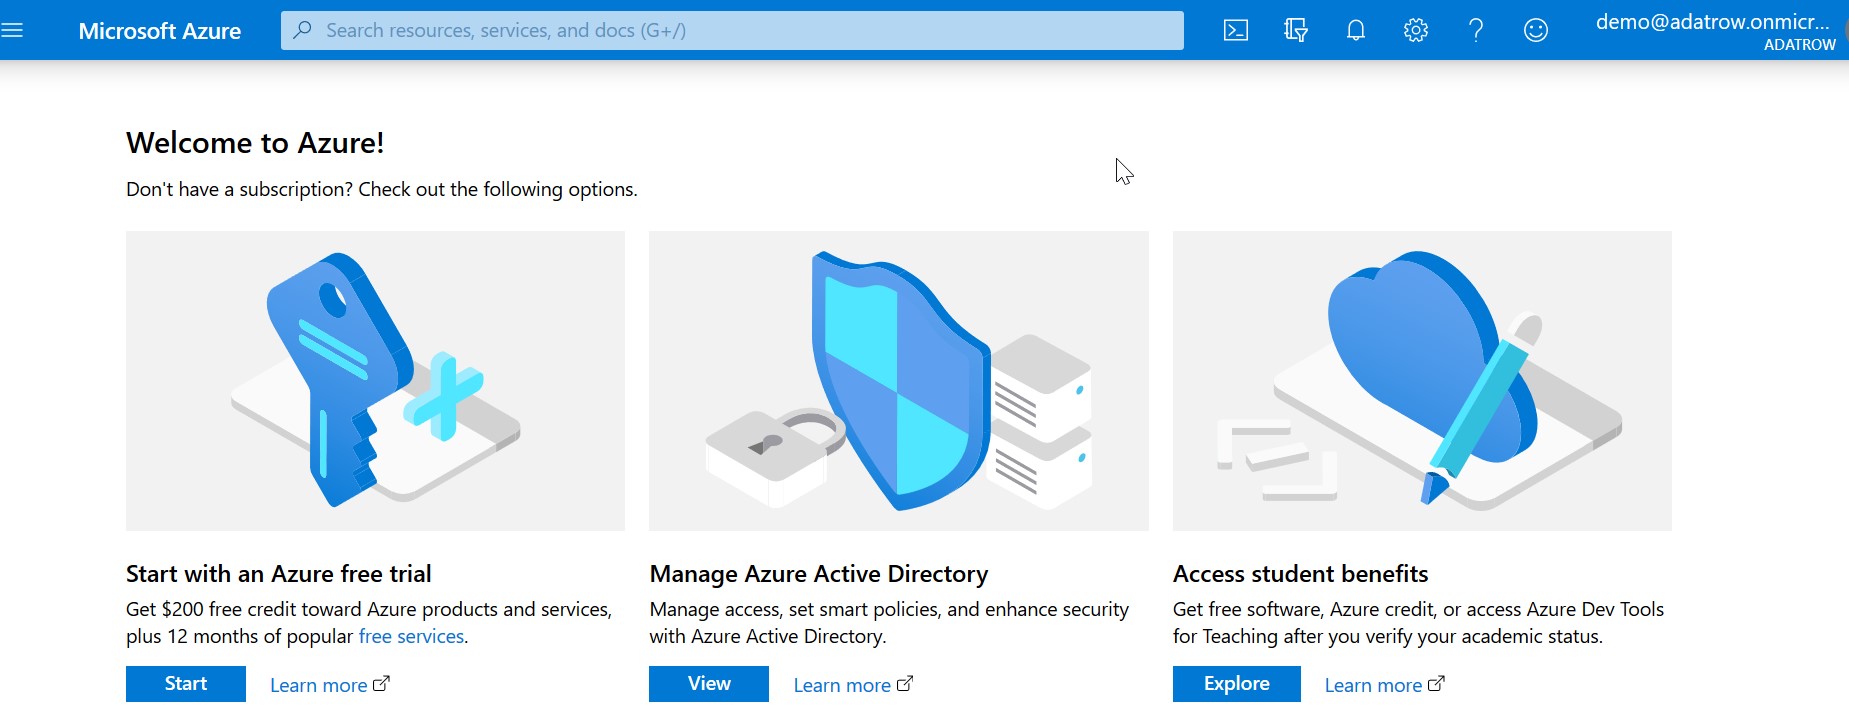
Log in to Azure Portal and select View for [Manage Azure Active Directory].
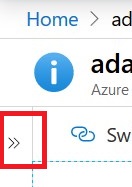
Expand the menu by selecting the >> icon.
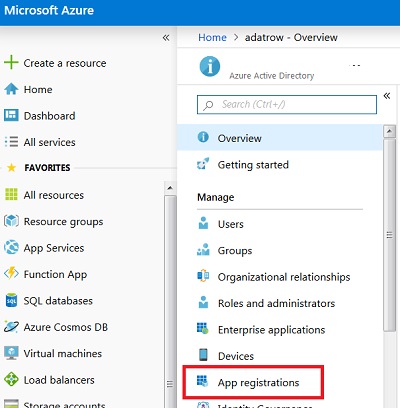
Select App registrations.
Select New registration
 .
.Enter a name for the application, select the single tenant option in the [Supported account type], and select Register.
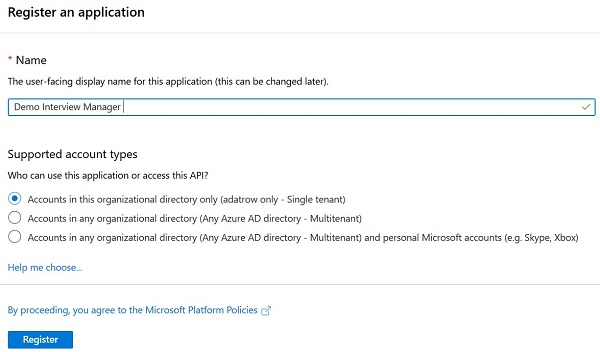
After the app is created, note the Application (client) ID and the Directory (tenant) ID.
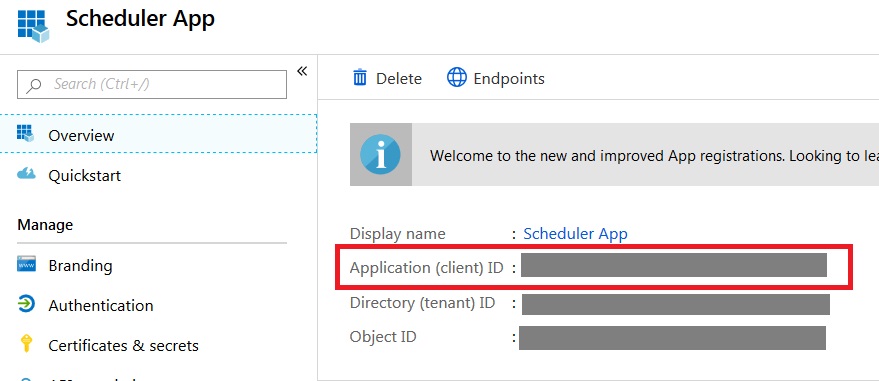
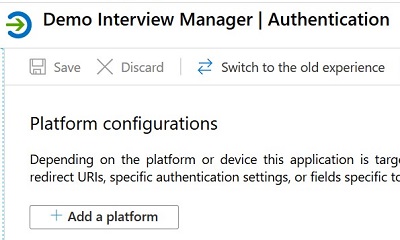
Select Authentication.
Select Add a Platform.
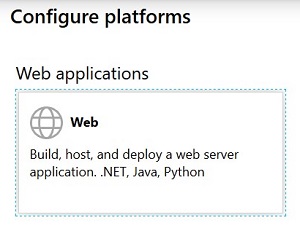
Select Web.
Enter the redirect URIs for the environment needed. Ensure all URIs for the environment are entered.
To enter multiple URIs, enter a URI in the [Redirect URI box], and select Configure. Then, select Add URI and repeat the process for all URIs.
US Production
https://trm.brassring.com/mobile/getcalendar
https://trmx.brassring.com/mobile/getcalendar
https://trmx128.brassring.com/mobile/getcalendar
https://trm128.brassring.com/mobile/getcalendar
Staging
https://staging.brassring.com/mobile/getcalendar
https://staging128.brassring.com/mobile/getcalendar
https://trmx-staging.brassring.com/mobile/getcalendar
https://trmx-staging128.brassring.com/mobile/getcalendar
EU Production
https://krb.brassring.com/mobile/getcalendar
https://krbx.brassring.com/mobile/getcalendar

After all URIs for the environment are entered, select Save.
Select Certifications & secrets and select New client secret.
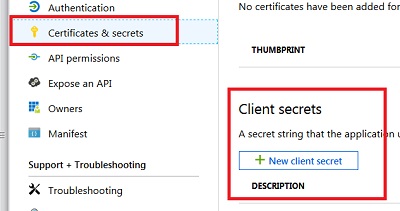
Enter a description, and select an Expiry setting that is appropriate to your organization's IT policies.
1 year - The secret key expires in 1 year from the date of creation and must be renewed before it expires. The integration fails after the expiry date.
2 year - The secret key expires in 2 years from the date of creation and must be renewed before it expires. The integration fails after the expiry date.
Never - The secret key never expires and does not need to be renewed.
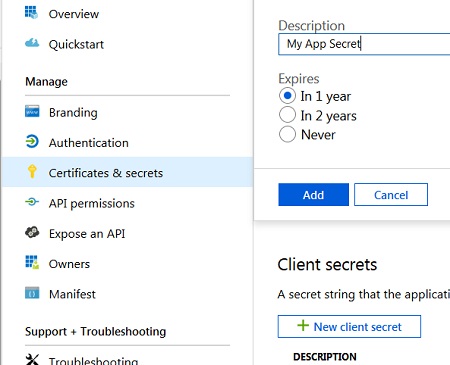
Select Add. After the client secret is created, note the value.
Select API permissions and then select Add a permission.
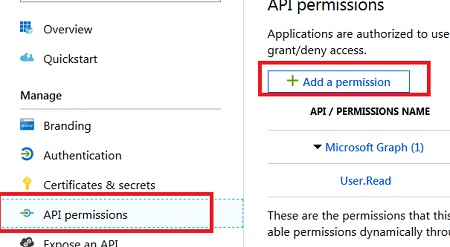
Select Microsoft Graph.

For the User Consent workflow, select Delegated permissions.
For the Admin Consent workflow, select Application permissions.

Expand the Calendars menu, select Calendars.Read, and select Add permission.

For the Admin Consent workflow, select Grant admin consent and the status updates to [Granted].

The Azure integration is now configured.
Workbench Configuration
In Workbench select Tools → Interview Manager → Calendar Configuration.
Select Advanced for Configuration Type.
If your organization uses a custom Microsoft login URL, this can be appended with whr query string parameter on this page. For example: https://login.microsoftonline.com/common/oauth2/v2.0/authorize?whr=<tenant name in Azure>
Select Select Provider.
Select Office 365 by using the pulldown menu, and select OK.
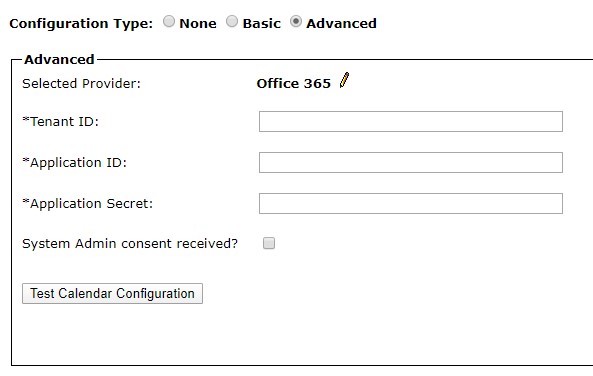
Enter the Tenant ID, Application ID, and Application Secret value.
Select System Admin consent received if the Admin consent workflow has been enabled.
Select Test Calendar Configuration. Calendars cannot be used until they have been tested.
Select Save.
GetScheduleAPI Request/Response data
BrassRing uses the GetSchedule API (POST /{user}/calendar/getSchedule) from Microsoft Graph to get the free busy times for an Office 365 user. API documentation can be found here. This is the only API endpoint that BrassRing uses to get the free or busy information of an Office 365 user. The request to this API from BrassRing includes the list of email addresses for whom the free or busy schedule is being requested (this is usually the interviewers selected in the Manage Schedules screen).
Request Body Sample:
{ "schedules":["test@test.onmicrosoft.com"], "startTime":{"dateTime":"2019-11-19T00:00:00"}, "endTime":{"dateTime":"2019-11-25T00:00:00"} }The response from the API is the free or busy schedule of the requested users. This GetSchedule API response does not include the actual meeting body or any attachments. The list of possible data elements for a meeting are listed here.
Response Sample:
{ "@odata.context":"https://graph.microsoft.com/v1.0/$metadata#Collection(microsoft.graph.scheduleInformation)", "value":[ { "scheduleId":"test@test.onmicrosoft.com", "availabilityView":"0000000000000000000000000000000000000", "scheduleItems":[ { "status":"tentative", "start":{ "dateTime":"2019-11-19T19:00:00.0000000", "timeZone":"UTC" }, "end":{ "dateTime":"2019-11-19T19:30:00.0000000", "timeZone":"UTC" } ], "workingHours":{ "daysOfWeek":[ "monday", "tuesday", "wednesday", "thursday", "friday" ], "startTime":"08:00:00.0000000", "endTime":"17:00:00.0000000", "timeZone":{ "@odata.type":"#microsoft.graph.customTimeZone", "bias":300, "name":"Customized Time Zone", "standardOffset":{ "time":"02:00:00.0000000", "dayOccurrence":1, "dayOfWeek":"sunday", "month":11, "year":0 }, "daylightOffset":{ "daylightBias":-60, "time":"02:00:00.0000000", "dayOccurrence":2, "dayOfWeek":"sunday", "month":3, "year":0 } } } } ] }