Product: Lead Manager
View, Add, Edit, and Delete Leads
• To view the details of a lead, select the Lead name on a lead grid.
Added Build 20.01.13. Speed browse is used in the Lead manager to review information for multiple candidates side by side. To view the speed browse window, select one or more candidates, and select Actions -> Speed Browse.
Select the tab headings to view the details of the leads.
The Actions menu is available in the speed browse window.
There are 3 methods to add a Lead to Lead Manager: manually add a new Lead, bulk Microsoft Excel upload, or bulk resume parsing
There are 2 methods to delete a Lead in Lead Manager: delete a Lead from the homepage, or delete a Lead from the Lead Profile.
Lead Manager supports the ability to add Notes to multiple lead profiles simultaneously on the Campaign Lead grid, the My Leads grid, the All Leads grid, and the Search Results grid. Each added note displays the note content, who added the note, and the date the note was added. When a Lead Manager user adds notes to a leads profile, the notes are added to any existing notes, and all notes are displayed in chronological order.
Stacking Logic is configured in Workbench.
Clients do not have access to the Integration Settings to configure their stacking logic. To review or change the Lead Manager stacking logic, contact your Infinite Representative.
When leads are added to Lead Manager, a duplicate check is performed using the defined stacking logic. If the lead already exists in the system, the Lead Manager updates the lead profile with any updated details.
If a BrassRing Candidate is sent to the lead Manager, but already exists as a lead, a link is made between the candidate and the lead. In this case, the leads details are not updated with any information from the candidate record.
Build 19.11.11. A Skills field is added in the Lead Manager's Lead profile section. When a resume or CV is uploaded to a lead profile, the skills information is parsed from the file and is added to the Skills field. If there are no skills parsed from the file, the field remains blank. Skills can also be added manually if needed.
Build 20.02.10. Select Table Display to update the lead grid details with 10 custom fields.
Build 20.04.06. Zap Info is a third-party vendor that provides API integration services for Lead Manager. For more information, see the Lead Manager API Demo.
Build 20.07.28. Filters can be added to the home page lead grids by selecting Filter>>. Filters are displayed when users select the filter link. The filters can be saved and edited as needed. If more than 10 filters are added, the filters are displayed in sections.
Build 20.10.12. Lead Manager lead profiles feature an action log starting this release. All the actions that are taken by Lead Manager users on a lead profile are recorded and presented in the action log. Users with appropriate privileges can access and view the action log to understand what were the actions that were previously taken on a profile.
Relevant eLearning
Process
Manually Add a New Lead
On the main page, select My Leads, Unassigned Leads, My Leads, or select menu.
Select Add new > Lead.
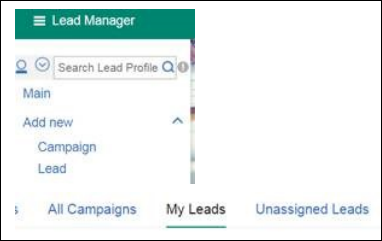

The Add Lead page opens:
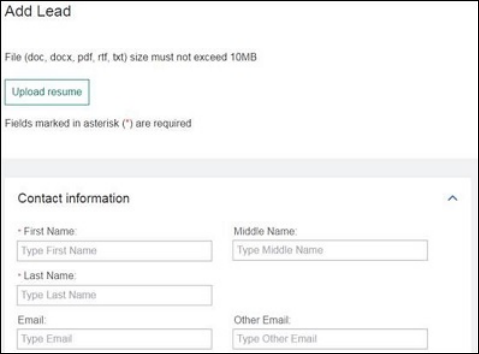
Fields that are marked with an asterisk (*) are required.
Upload the Leads’ Resume/CV (not required) – The Resume/CV must be in a readable format (.doc, .docx, .rtf, .txt) and be less than 10 MB.
Enter the Leads contact information, Work experience, Education, Compensation, and relationship to the company.
Optionally, select a Campaign, Lead Status, and add any Notes.
Select Save & View to save changes, or Cancel to remove the changes.
Bulk Microsoft Excel Upload
On the main page, select My Leads, Unassigned Leads, or select menu.
Select Add new > Bulk Upload (Excel).

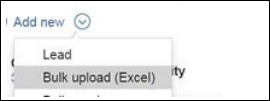
Download and open the template that is provided.

Open and complete the template in Microsoft Excel with the Lead details that you want to add to Lead Manager, and save the Excel file.
In Lead Manager, use the pull-down menu to select a Language.
Select Upload, select the completed template, and select Open.
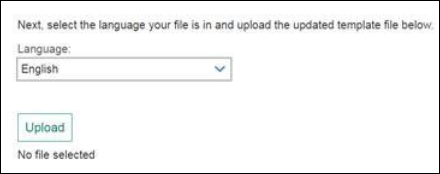
Select Continue.
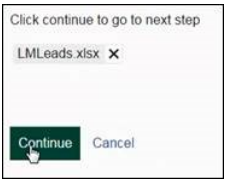
Select Import to complete the process.
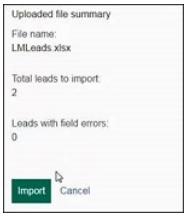
The Lead Manager emails you when the import is complete.
Bulk Resume Parsing
On the main page, select My Leads, Unassigned Leads, or select menu.
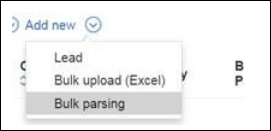
Select Add new > Bulk Parsing.
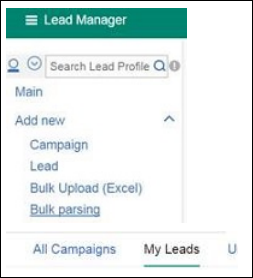
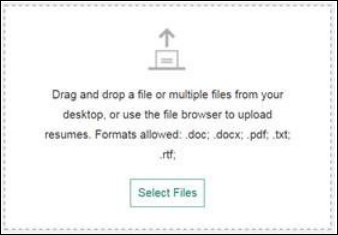
The Bulk Parsing window opens. Drag a file, or multiple files, from your desktop, or use the file browser to upload resumes. Up to 200 resumes can be parsed at one time.
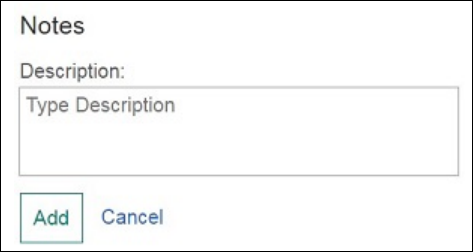
Optionally, select a Source, Campaign, Lead Status, and add any Notes.
Build 20.04.06. Optionally, select the Required Fields for the bulk resume parsing. Required Lead fields must be selected as mandatory in the Administer Lead Fields page in Workbench. For more information, see Configure Lead and Campaign Fields. If the original lead has data in any required custom lead field, that data is not overwritten from any bulk parsing workflow for required custom lead fields. If the original lead has no data, the field is updated from data entered on the Duplicate Review page or the Error Review page only, and not from the bulk parsing import page.
Select Import. Lead Manager emails you when the parsing is complete.
Select Menu > Review Bulk Parsing to open a review of the profiles that have not been added to the system from the Bulk parsing upload.
Select Errors to see a list of Leads that were not added to the system and the reason why.
Select Duplicates to see a list of Leads that were already in the system before the upload, and select to update the existing Lead profile or Discard the uploaded Lead Profile.
Editing Leads in Lead Manager
Search for, and open, a Lead Profile.
Select the pencil to edit that section:
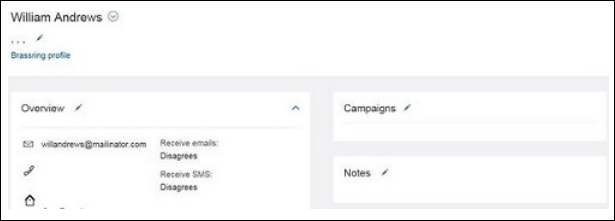
Select Save & View to save the changes, or Cancel to remove the changes.
Adding Notes To Multiple Leads
On the Campaign Leads, My Leads, All Leads, or search results grid, check one, or more, Leads.
Select Take Action > Add Notes.
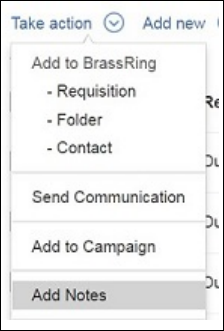
Enter the Note text into the Description and select Add.
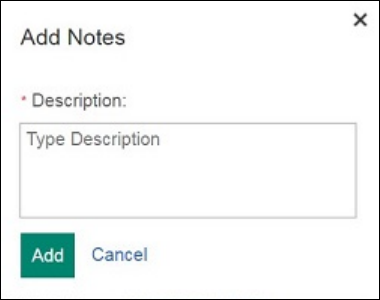
A confirmation message displays. Select OK.
Add attachments to a Lead Profile
There are two methods to add attachments to Lead Manager.
Method 1:
Open a Lead Profile.
Access the Attachments section, and select Add Attachment.
Select the file from your computer.
The attachment uploads to the Lead Profile.
Method 2:
Open a Lead Profile.
Select the Edit pencil icon.
Access the Attachments section, and select Add Attachment.
Select the file from your computer.
Select the attachment type by using the pull-down menu.
The attachment uploads to the Lead Profile.
Delete a Lead from the Homepage
Deleted Leads remain in the database for approximately 20 minutes after they are deleted. Leads might be present in search results until the database refreshes.
Select New leads or Unassigned Leads.
Check one or more Leads.
Select Take action > Delete.
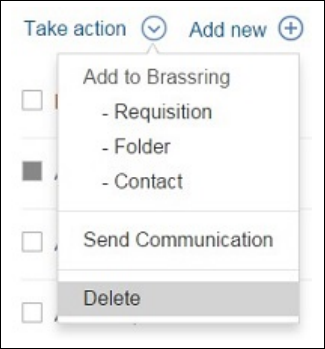
Delete a Lead from a Lead Profile
Deleted Leads remain in the database for approximately 20 minutes after they are deleted. Leads might be present in search results until the database refreshes.
Search for, and open, a Lead Profile.
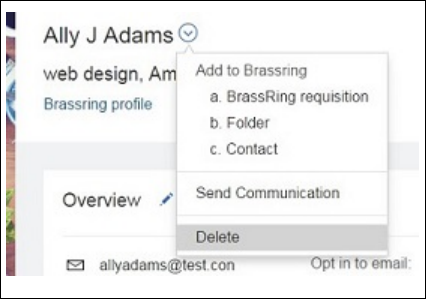
Select the Down Arrow.
Select Delete.
