Users of the Lead Manager application can save their filtered lead search results based on the applied filters as a Contact List or a Query List, which are visible in the Mailing List. This feature allows users to easily access their saved mailing lists from the hamburger menu in Lead Manager.
Contact List: This is a finite list of specific individuals. To update the list requires manually adding an individual to the list.
Query List: This is a list that is dynamically generated at the time of sending based on the criteria of the query.
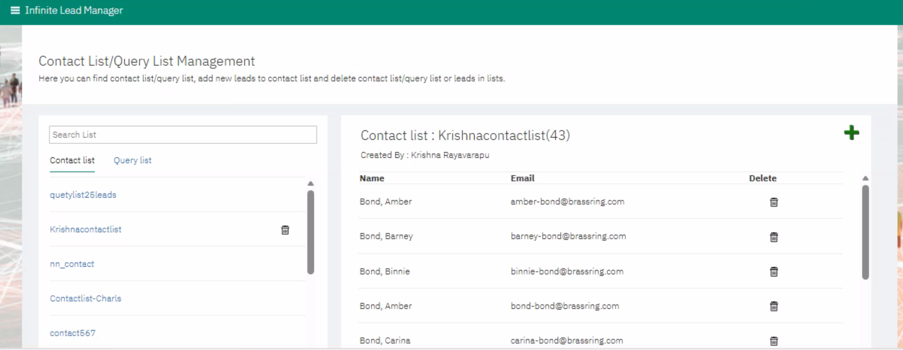
Upon accessing any of the saved mailing lists, users will see the columns for Lead Name, Email, and Delete. Users can send communications to the leads included in their Contact or Query mailing lists and have the option to edit or delete their saved lists.
1. Creating a Mailing List
To create a Contact or Query list, please follow the steps below:
Navigate to the Leads screen and apply the required filters to narrow down the leads.
Select the leads that you want to include in the mailing list.
Click on the “Save As List” option available at the top-right corner.
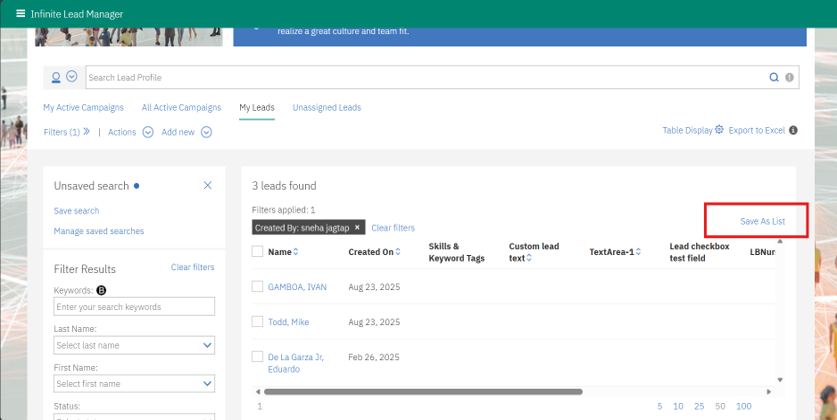
4. A pop-up window will open. Select the Contact list or Query list and enter the mailing list name.
The mailing list name should contain only letters, numbers, and hyphens.
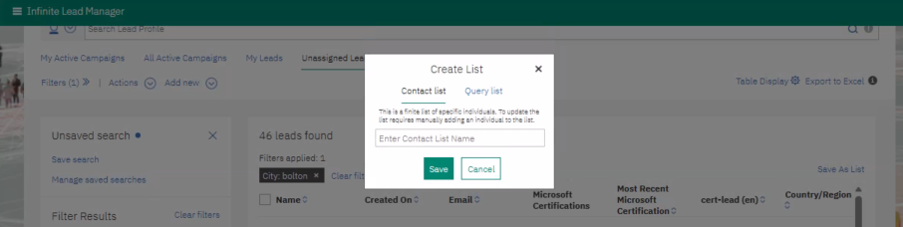
5. Click on Save.
6. A confirmation message will be displayed based on the type of list that is saved: “The Contact list is saved in Lead Manager.” Or “The Query list is saved in Lead Manager.”
2. Editing/Deleting an Existing Contact List
To add new leads to an existing mailing list:
Click on the Hamburger Menu and navigate to Mailing Lists.
.png)
Select the Contact list.
For the Contact list to which you want to add new leads. Click on the Plus (+) icon available at the top-right corner.
4. Enter the following details:
First Name
Last Name
Email ID
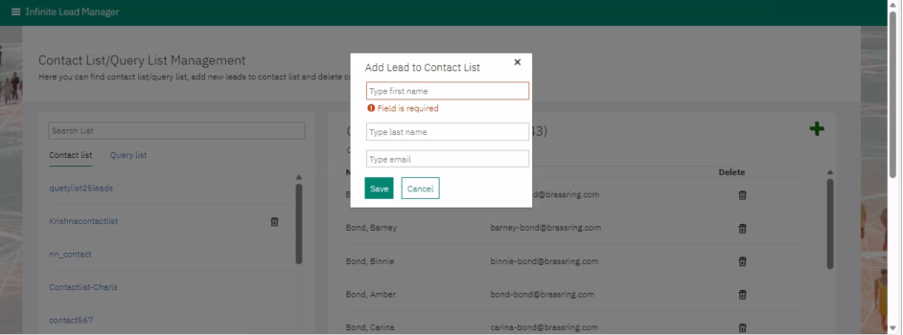
5. Click on Save to add the lead to the mailing list.
Note: Users can only view and delete a Query List. Leads to a Query list are added based on the query.
3. Using a Mailing List for Communication
Mailing lists can be used while sending email communications as outlined below:
Click on the Hamburger Menu and select Send Communication.
Choose an email template.
You will be redirected to the Compose Message screen.
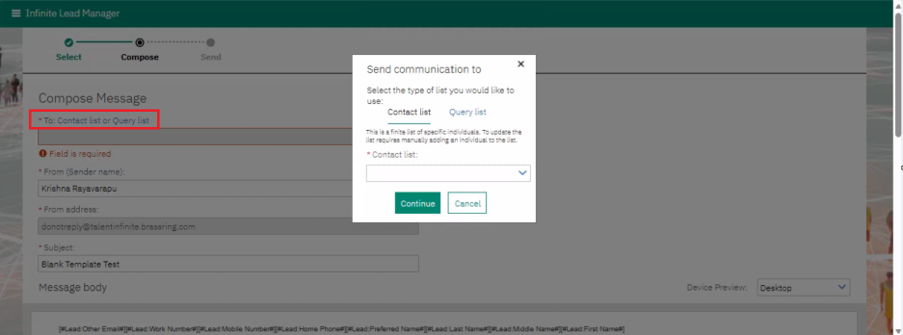
In the To field, select the Contact list or Query list option.
Choose the required mailing list.
Click Continue and then Send to deliver the communication to all leads in the selected list.
4. Views Where “Save As List” Is Available
The Save As List option is currently available in the following flows:
My Leads
Unassigned Leads
My Active Campaigns / All Active Campaigns
- Navigate to Lead Count
- Click on Advanced Filter View (top-right corner)